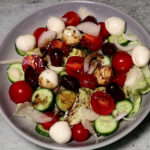
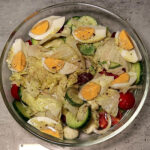
Here is another tasty and delightfully filling baby mozzarella and cherry tomatoes salad which is completely vegetarian and really easy to make.
This mozzarella and tomatoes salad is traditional and although it is used mostly in the summer months, you can make it in all the other months too because you can find most if not all the ingredients in the supermarkets all year round and you can substitute any ingredient you don’t find with a similar one.
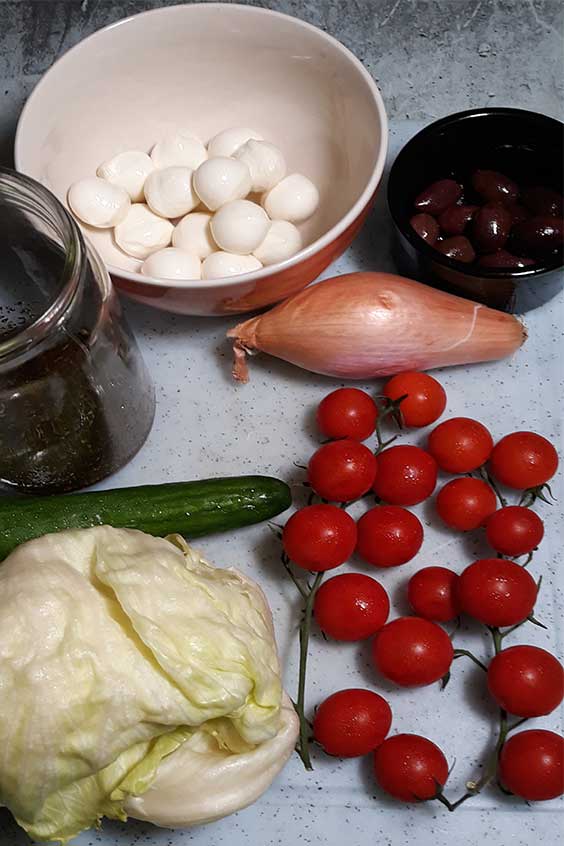
These ingredients are filling and eating the baby mozzarella and cherry tomatoes salad will provide you with energy for hours, so besides having a very healthy salad, you will not be hungry until next mealtime.
To keep this salad really simple, I also used my ready in one minute salad dressing which helps make this mozzarella and tomatoes salad ready in under ten minutes.
Although you can slice the mozzarella balls and the cherry tomatoes, you can leave them as they are because they are bite size. That leaves only the iceberg lettuce, cucumber and onion to be sliced which makes the preparation time less than five minutes.
I usually only slice a few of the cherry tomatoes to make the salad look more appetising, but you can make your own mind about this step, this will only take less than a minute, so you decide which way you prefer.
Use a large bowl for your mozzarella and cherry tomatoes salad and after mixing the ingredients, dish out what you would like to eat in smaller salad bowel before you add the dressing. This will help keep your salad fresh.
Watch How To Make This Baby Mozzarella And Cherry Tomatoes Salad
As you can see from the picture, to make the dressing for the mozzarella and cherry tomatoes salad I only used, olive oil, balsamic vinegar, dried oregano, sea salt and fresh pepper.
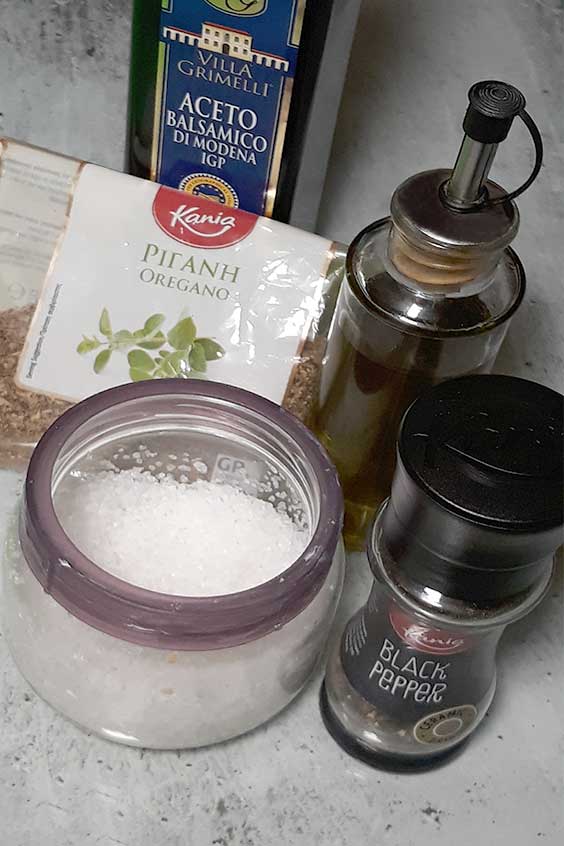
As there are very few ingredients to make this baby mozzarella and cherry tomatoes salad, it is important to use good quality olive oil and balsamic vinegar because they will make your salad taste amazing.
To make this perfect and really easy to make dressing for your baby mozzarella and cherry tomatoes salad, use a dressing jar to mix the dressing ingredients.
Add one tablespoon of olive oil, one tablespoon of balsamic vinegar, a teaspoon of dried oregano, one teaspoon of sea salt and one teaspoon of freshly ground black pepper.
Mix very well for about half a minute to let the sea salt dissolve and use straight away, or give it another mix if you add it later.
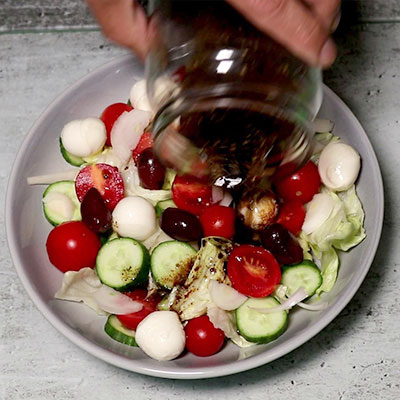
Besides the amazing taste of all the fresh ingredients in this baby mozzarella and cherry tomatoes salad, you will find out how tasty the salad dressing makes your salad tastes which is completely different from not having the dressing on your salad.
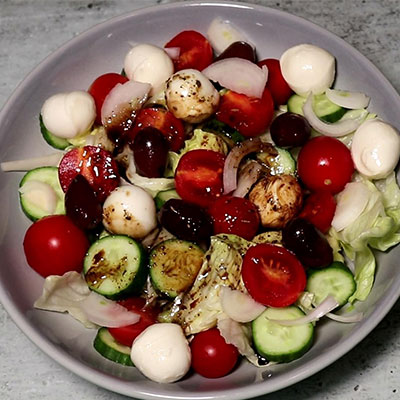
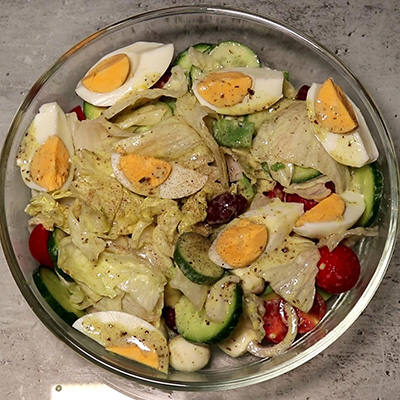
At the time of making this mozzarella and cherry tomatoes salad, I am staying on the Greek island of Crete and as you can see from the picture I have some Greek black olives complete with the pits which make the olives taste amazing.
I have tried this same salad with boiled eggs which adds an extra layer of protein and taste to the salad, but it also makes the preparation time for this salad around twenty minutes. If you like to try this salad with boiled eggs, you may like to boil the eggs earlier in the day or even the day before so that they are ready when you want to make your salad which keeps the salad preparation time under 10 minutes. Well, you can call it cheating with time, but every little helps. The eggs will keep fresh in the fridge, you’ll just be using time to your advantage!!!
Here is another tasty and delightfully filling baby mozzarella and cherry tomatoes salad which is completely vegetarian and really easy to make. This mozzarella and tomatoes salad is traditional and although it is used mostly in the summer months, you can make it in all the other months too because you can find most if not all the ingredients in the supermarkets all year round. You can substitute any ingredient you don’t find with a similar one.
Ingredients
Scale
1 Small Iceberg Lettuce
1 Cucumber
1 Small Onion
200g Cherry Tomatoes
200g Baby Mozzarella Balls
100g Black Olives
1 tbsp Olive Oil
1 tbsp Balsamic Vinegar
1 tsp Sea Salt
1 tsp Dried Oregano
1 tsp Black Pepper
Instructions
Chop the iceberg lettuce into bite size pieces and place in a large salad bowl. Slice the onion into thin slices and scatter on top of the lettuce.
Slice the cucumber into medium size slices and place on top of the lettuce and onions.
Toss the baby mozzarella balls, cherry tomatoes and black olives into the salad bowl.
Use a salad dressing jar to make the salad dressing. Add one tablespoon of olive oil, one tablespoon of balsamic vinegar, one teaspoon of sea salt, one teaspoon of dried oregano and one teaspoon of freshly ground black pepper.
Mix the salad dressing ingredients and shake the jar before sprinkling the dressing on top of the salad.
Notes
If you like to have boiled eggs with this salad, you may consider boiling them ahead of time, early in the day or the day before, so they are ready when you start making the salad.
You can substitute any of your salad ingredients with a similar one if unavailable.
This egg in hole sandwich is a delicious, full of goodness breakfast. It is so yummy, easy to make and totally vegetarian. It will get your day off to a fantastic start providing you with energy for hours.
Let’s make this yummy egg in hole sandwich for breakfast, or you can have it whenever you like during the day, especially if you have little time to make a quick meal, as it will be ready within ten minutes.
Watch How To Make Egg In Hole Breakfast Sandwich
Start with a large frying pan on medium heat and when it gets to temperature, turn the heat down to medium/low.
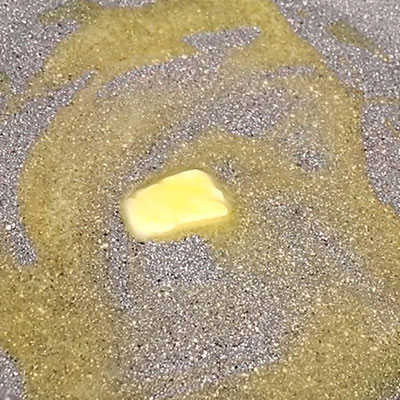
Brush a tablespoon of olive oil on the whole surface and add in a tablespoon size of butter block.
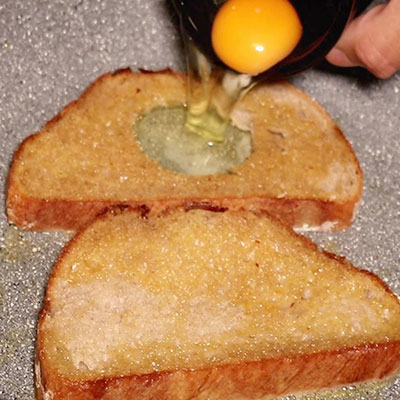
Use a silicon spatula to spread the butter while it melts allover the frying pan, so your bread will get buttered and tasted allover. After one minute flip the bread to the other side, crack and pour an egg into the hole.
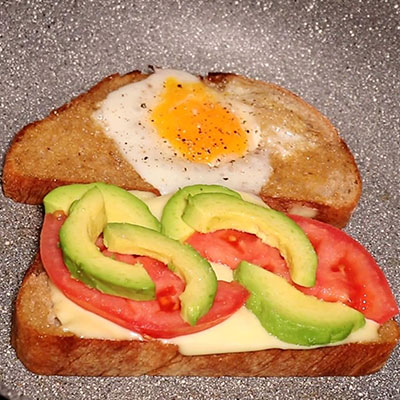
Add two slices of cheese on the second slice.
Cut the large tomato slice into two halves and place them on top of the cheese.
Next, add the avocado on top of the cheese and tomato wherever you find room to squeeze them in.
Cover the pan for two minutes and after the egg white starts to look cooked, remove the lid and sprinkle some salt and fresh pepper to taste.
Using a wide spatula, remove the bread slice with the cheese, tomato and avocado first and place it on a plate. Remove the second bread slice with the egg and stack it on top of the first slice. Using a bread knife, slice the egg in hole into two halves and enjoy your yummy breakfast.
If you like your egg very soft, you can reduce the temperature to low and on the other hand if you like your egg fully cooked, you can turn the heat to medium, as long as you keep the frying pan covered with a lid to let the heat cook the egg top.
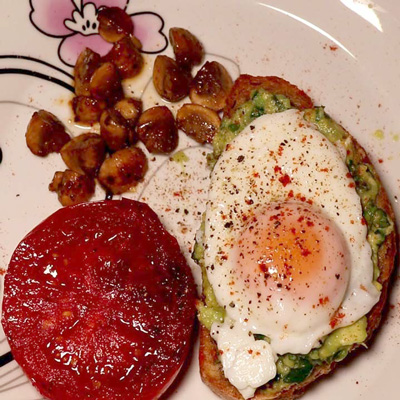
As you can see from the picture the bottom half of the egg is fully cooked while the top is semi soft, which is perfect for an egg sandwich.
Also, you can see the cheese has melted and covered the tomato and avocado which gives them a really yummy taste and make the whole egg in hole sandwich look very appetising.
This breakfast sandwich is almost like a full meal with juicy tomato, the super fruit avocado, melted cheese and protein from the egg, all with a double-decker crunchy toasted bread that not only looks yummy but it tastes amazing too.
All done in about ten minutes, this breakfast will set your day for a great start and give you energy that lasts for hours.
And if you decide to have this egg in hole later on in the day, you can have a couple for lunch or dinner that take so little time to make and won’t break the bank either.
This is my second favourite breakfast that I enjoy making ( and eating ???? ) especially when I’m pushed for time but don’t want to skip breakfast, because lets face it, we’ve all done that and ended up drinking coffees and nibbling on biscuits and other not so healthy quick snacks.
I am not a fan of bacon or any other meat for breakfast, but if you like to add bacon to this egg in hole breakfast, you can lightly heat up the bacon slices first before you place the butter in the pan, put them aside and add them above the cheese slices.
Ingredients
Scale
2 Slices Sourdough Bread
1 Egg
1 Large Slice Tomato
2 Slices Avocado
2 Slices Cheese
1 tbsp Olive oil
1 Small Block Butter
Salt & Pepper To Taste
Instructions
Slice a tomato into 2 halves slightly off centre and make a large slice out of the larger half. Slice an avocado into 2 halves and make small slices out of one half.
Slice 2 large sourdough bread. Use a glass or cookie cutter to make a hole in the centre of one of the bread slices.
Heat up a large frying pan on medium/low, brush 1 tablespoon of olive oil, add a tablespoon of butter and let it melt completely. Toast the bread slices on the butter, flip the bread over after 1 minute. Crack and pour the egg into the hole, add 2 slices of cheese, 1 slice tomato and the sliced avocado.
Cover the pan for 2 minutes ( do not skip this part ). Add salt and pepper to taste. Using a wide spatula, remove the bread slice with cheese tomato and avocado first onto a plate. Remove the second slice of bread with the egg and stack it on top of the first slice.Using a bread knife, slice the sandwich into 2 halves. Enjoy your egg in hole breakfast.
Notes
Use low heat if you want your egg softer, make sure you cover the pan so the top of the egg cooks evenly and remove when the egg white is cooked.
Prep Time:5 mins
Cook Time:5 mins
Category:Breakfast
Method:Stove Top
Cuisine:Mediterranean
Nutrition
Serving Size:
Calories:441
Sugar:2.7 g
Sodium:2797.6 mg
Fat:32.4 g
Carbohydrates:24.2 g
Protein:15.1 g
Cholesterol:205 mg
Keywords: Best Breakfast, Sandwich, Egg In Hole, Avocado, Tomato, Delicious
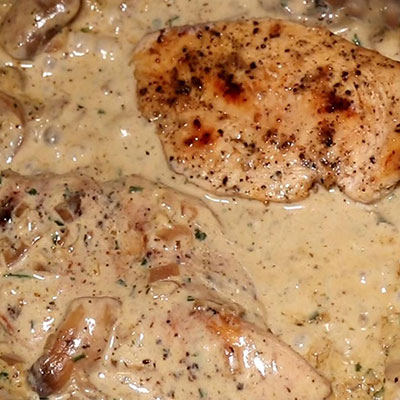
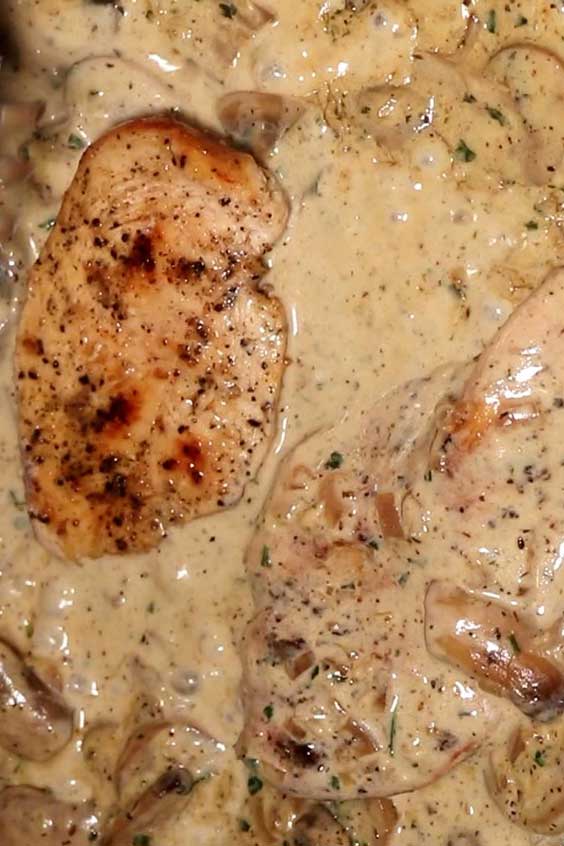
Winner Winner, Juicy Chicken And Mushrooms Dinner. Hey fellow foodies, this is an easy meal you can make anytime you like within 30 minutes. It tastes amazing and will costs you a fraction of the exact meal served in a restaurant, how do I know this? Because we served it in the Italian restaurant I worked at.
I made mushroom sauce and used roast potatoes, but you can use any vegetables you like instead, I have made the same meal with many different vegetables instead of roast potatoes including cauliflower, broccoli, garden peas and green beans amongst many others.
Watch how to make the Creamy Chicken And Mushrooms
One thing you can do to make this meal outstanding is to make the chicken very juicy by keeping it steamed whilst it’s cooking, using a lid to cover the chicken whenever possible to help keep it moist.
This is really a delicious Chicken And Mushrooms meal and the ingredients are very simple and are mostly available in every kitchen. It is an art that you will master with a little practice to make the chicken breast crispy on the outside and juicy in the middle.
Using high heat and a pan with a lid to keep the chicken cooking in steam will help crisp the chicken and keep the moisture.
Chicken broth and cream also help to make the chicken tasty and creamy, and a little help comes from the selected herbs and spices, you will eat with your eyes first when you see the mushroom sauce being made, well, this is one of those meals that does that to you.
And when it all comes together, this Chicken And Mushrooms dish looks and tastes so delicious that you would just want to make it again and again. This is one of a very few meals that are really tasty, with high value because it cost so little and it is also so easy to make.
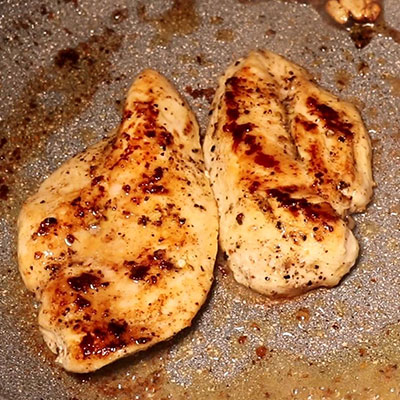
Start by sizzling the chicken on high heat to give it a golden crisp and keep the pan covered whilst you crisp the chicken to help the chicken stay moist, roughly about 3 minutes in total on each side, then remove the chicken aside while you saute the mushrooms and make the creamy sauce.
How To Make The Mushroom Sauce
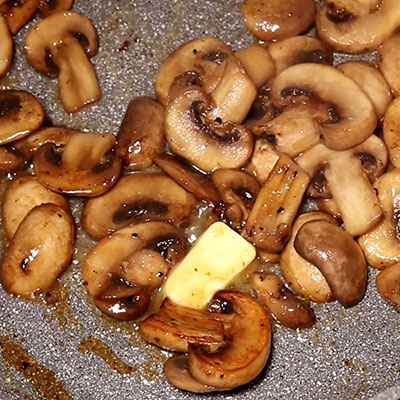
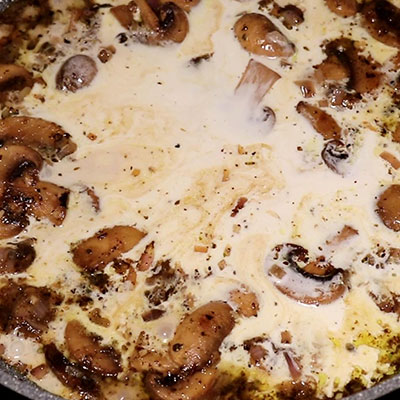
As soon as you remove the chicken from the frying pan toss in the sliced mushrooms into the chicken juices and turn until all the mushrooms get some of the chicken juices. Add a small block of butter to keep the mushrooms sizzling then add the diced onion and onion puree, chopped garlic, dried oregano and cinnamon.
Add a cup of chicken broth, mix it all well to combine all the ingredients, bring it to the boil, then add the cream and the chopped fresh parsley.
Grate a little Parmesan cheese and let the sauce reduce. Then reduce the heat to medium.
Add the chicken back into the simmering sauce for a couple of minutes turning a couple of time to let the chicken gets smothered by the mushroom sauce.
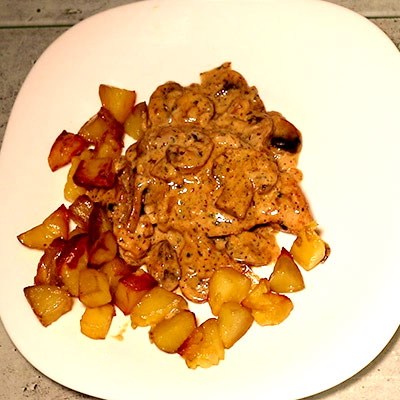
Dish out the chicken and mushrooms with a little sauce and add the roasted potatoes to have a fantastic juicy chicken and mushroom sauce with crispy potatoes.
This is one of those tasty meals that you can make in under 30 minutes with very little preparations. The roast potatoes take around 25 minutes in the oven, by that time you can slice the chicken breast, chop the onion, garlic and fresh parsley, cook the chicken and mushroom sauce and have everything ready at the same time you remove the roast potatoes from the oven. All you have to do then is devour this amazing and yummy Chicken And Mushrooms meal. Buon Appetito.
Winner Winner, Juicy Chicken And Mushrooms Dinner. This is an easy meal you can make anytime you like within 30 minutes. It tastes amazing and will costs you a fraction of the exact meal served in a restaurant, how do I know this? Because we served it in the Italian restaurant I worked at.
Ingredients
Scale
1 Large Chicken Breast
200g Mushrooms
4 Small Potatoes
1 Medium Onion
200ml Cream
1 Cup Chicken Broth
3 Clove Garlic
1 tbsp Fresh Parsley
1 tsp Oregano
1/2 tsp Cinnamon
2 tbsp Olive Oil
2 Small Blocks Butter
A teaspoon Of Parmesan Cheese
Salt & Pepper To Taste
Instructions
Preheat oven to 200 degrees C (approximately 400 degrees F), chop the potatoes into small cubes to help them cook faster. Brush 1 tablespoon olive oil into an oven-safe bowl, add the potatoes and cover with foil paper. Place the potatoes into the oven for 15 minutes, then take them out, turn them and place back in the oven for 10 minutes without the foil paper to let them crisp.
Slice the chicken breast sideways into 2 halves, sprinkle with sea salt and fresh pepper on both sides. Cut the onion into 2 halves, dice one half into small pieces and use a grater to puree the other half. Slice the mushrooms into thick slices, chop 2 garlic cloves and a tablespoon of fresh parsley into fine pieces.
Add 1 tablespoon of olive oil, a small block of butter and a whole clove of garlic into a frying pan. Crisp the chicken for 2 minutes on medium/high heat, sizzle the chicken and cover the pan with a lid for a further minute on each side. Remove the chicken from the pan and put a side to rest. Add the sliced mushrooms into the pan and turn in the leftover chicken juices. Add a small block of butter and continue to turn the mushrooms. Add the diced onion, onion puree, chopped garlic, oregano and cinnamon and mix with the mushrooms.
Dissolve 1 block of chicken broth into a cup of hot water and add it to the frying pan. Mix well. Add the cream, chopped parsley, mix well and bring to the boil. Sprinkle a teaspoon of Parmesan cheese
Reduce the mushroom sauce, add the chicken breast back into the sauce and turn for a couple of minutes. Serve the chicken, mushrooms and sauce with the roast potatoes. Enjoy.
Notes
You can use heavy or whipping cream for the sauce.
How to make homemade pizza! Pizza is one of my favourite food choices and I absolutely love making and eating pizza. Mama Mia, I am not 100% sure, but I think everybody loves pizza, especially kids, teens and young at heart adults ( lets say up to 80 years old, just to be on the safe side ). In fact, I have never met anyone that doesn’t love pizza, and if you know someone who doesn’t, please don’t introduce us ????. Making homemade pizza is not as hard as you might think. You can make it thin and crispy or thick and chewy. I have been making pizza for years and I have tried many different recipes.
I started experimenting with pizza using the the thin and crispy base because it is much easier but soon got bored with it and wanted to make the spongy chewy base pizza and it was hit and miss because I didn’t know what I was doing.
To make a consistent quality homemade pizza, you need to know the rules associated with making pizza. The dough, the sauce, cheese, toppings, oven temperature and many other little things that need to be understood if you want to make a good homemade pizza every time.
A great looking and tasting pizza have a base that doesn’t flop down when you hold a pizza slice, a chewy, springy crust that will bounce back up when you press it down and also has a slightly brown crust and cheese, no large cremated bubbles and large black spots, little ones are inviting though.
For a homemade pizza using your domestic oven you need to invest in a pizza stone to be able to cook the base of the dough correctly. A stone is what most professional restaurants, pizzerias and pizza takeaway/delivery places use in their large pizza ovens to cook the pizza because a stone gets very hot and holds the temperature well.
You will also need to invest in a pizza peel or shovel so you can place the pizza in and out of the oven easily in one piece. These will last you many years, so, make life easy.
To make the perfect pizza you need to make the perfect dough, the perfect sauce and the perfect pizza preparation (putting everything together). You also need to heat up your oven to the maximum temperature for about an hour to give the pizza stone time to get hot enough to cook the base of the pizza. This is the most important thing to cook the pizza the way it should be cooked.
Because I will be posting many different pizza recipes, I thought it would be better for everyone if I posted how to make the dough and how to make the sauce in their own posts, so I don’t have to repeat posting them with every new pizza and to also keep the pizza posts shorter, saving time for both, you and me.
Before you start to shape your homemade pizza prepare the pizza sauce, the cheese and any toppings for your pizza and have everything ready so you can move quickly when your homemade pizza is ready to go in the oven. The semolina and flour help the pizza slides off the peel onto the pizza stone, but if you take too long they will go inside the dough and your dough will stick to the peel.
It is important to flour everything that comes in contact with your pizza dough including your hands so the dough doesn’t stick. Start by sprinkling flour and semolina on the work surface and place the dough on top.
Start pressing the dough about 25mm/1 inch from the outside to form the crust. Turn the dough round as you continue to form the crust all around. Next, place one palm down next to the crust’s inside and stretch in opposite directions with both hands as you stretch with your palm and pull with your thumb and fingers of the other hand, all as you turn the dough round at the same time as you can see in the video.
When you finish stretching the pizza, it should look like the picture below. Sprinkle flour and semolina on the pizza peel and gently move the dough onto the peel. You now need to work quickly to add the pizza sauce, mozzarella cheese and toppings so you can place your homemade pizza on the pizza stone.
Next start adding the pizza sauce, mozzarella cheese and toppings, try to use as little and few items as possible, this will help keep the top of your pizza light and prevent it from being soggy.
Watch the video for the recommended amounts and notice the slice is staying flat and not flopping down.
Once you’re done adding the toppings, place the pizza on the pizza stone and keep monitoring the pizza. When the pizza crust and cheese start to brown, your homemade pizza is ready. Use the peel to remove it and place it on a chopping board.
Grate some parmesan cheese and add a drizzle of olive oil on your pizza.
Optional, you can mix a little pizza sauce with half a teaspoon of garlic granules and a teaspoon of olive oil to brush the crust giving it a hint of garlicky taste.
Use a pizza slicer to slice it as you like. I find it easier to make 8 slices by making 4 symmetrical cuts.
If you like this pizza, check out the other dinner recipes on the recipes page.
Pizza is one of my favourite food choices and I absolutely love making and eating pizza. Making homemade pizza is not as hard as you might think.
To make a consistent quality homemade pizza, you need to know the rules associated with making pizza. The dough, the sauce, toppings, oven temperature and many other little things that need to be understood if you want to make a good homemade pizza every time.
I have been making pizza for years and I have tried many different recipes.
Ingredients
Scale
0g Pizza Dough
50g Pizza Sauce
50g Mozzarella Cheese
30g Mushrooms
15g Onions
15g Red Peppers
3 tsp olive Oil
10g Parmesan Cheese
1/2 tsp Garlic Granules
Flour & Semolina For Stretching
Instructions
Heat Up A Pizza Stone Inside The Oven On Maximum Heat For 1 Hour
Prepare Pizza Sauce, Mozzarella Cheese & Toppings
Prepare Work Surface Using Flour & Semolina For Stretching The Pizza Dough
Stretch The Pizza Dough To Form A Circular Shape With 15mm / 1 Inch Crust
Place Pizza Dough On Lightly Covered Pizza Peel With Flour & Semolina
Cover The Dough With A Light Coat Of Pizza Sauce
Evenly Cover The Dough With Mozzarella Cheese, Mushrooms, Onions & Red Peppers
Using The Pizza Peel, Place The Pizza Dough On The Hot Pizza Stone
Optional – Mix A Little Pizza Sauce With 1/2 tsp Garlic Granules & 1 tsp Olive Oil
Remove The Pizza When The Crust & Cheese Start To Brown.
Brush The Pizza Crust With The Optional Mix For A Hint Of Garlicky Flavour
Grate Parmesan Cheese On Pizza
Drizzle 1 tsp Olive Oil On Pizza
Slice Pizza & Enjoy
Notes
Please Note Pizza Dough & Pizza Sauce Are Posted Separately To Save Time And Make The Individual Pizza Posts Shorter. The Cooking Time Assumes You Already Have The Pizza Dough & Pizza Sauce Prepared.
Cooking Time May Vary Slightly Depending On Your Oven Maximum Temperature.
Homemade pizza sauce is easy to make and better than most ready made sauces that you can easily buy. The two primary items that make a delicious homemade pizza are the pizza dough and the pizza sauce. If either of these two does not taste as it should, there is no way you would have a pizza that tastes good.
I have been making pizza for many years and have worked in an Italian pizzeria for five years and after all that experience, I have developed my own secret homemade pizza sauce recipe and I will share it here with you (I guess it won’t be much of a secret anymore). It is absolutely delicious and besides using it as a pizza sauce, you can use it for many other dishes including pasta. Not sure if you’ve noticed, but not many pizza chefs share their pizza sauce recipe.
Once you have made this sauce for the first time, you will be making it for just about everything you like to have a delicious red sauce with. Simple ingredients, easy to make and the result is a very tasty sauce.
Watch How To Make The Best Homemade Pizza Sauce
To start making the pizza sauce, sauté diced onions in one tablespoon of vegetable oil on medium heat until they turn translucent.
Add chopped garlic and stir until they become soft.
Add two tablespoons of tomato puree and stir until they get mixed with the onions and garlic.
Add tomato juice and turn the temperature to high.
Next, add salt, pepper, sugar, dried oregano, dried basil and bay leaves.
Cover and cook on low heat for forty minutes until the sauce is reduced and becomes thick. Add one tablespoon of olive oil and mix well. Remove the three bay leaves.
You will now have a delicious aromatic homemade pizza sauce. Let the sauce cool down completely before you can use it on your homemade pizza. This sauce is good to refrigerate for three days. You can also divide it into portion size (fifty grams) and freeze it in sealed containers or freezer bags.
If you like this pizza sauce recipe, check out the other dinner recipes on the recipes page.
The first thing that makes a perfect homemade pizza is the pizza dough and besides the pizza sauce and cheese, everything else is less important. So, once you have learnt how to make the perfect pizza dough, you’ll be on your way to make the best homemade pizza.
Although making a good pizza dough is relatively easy, there are rules that must be followed in order to achieve your goal. Most people get one or more of these rules messed up and fail to make a good dough.
01 – Everything that comes in contact with the dough must be floured especially your hands. This will prevent it from sticking. The first thing to consider is the flour to make the dough with. There are many different varieties and it is very easy to use the wrong flour. For a pizza dough, the flour needs to be a strong flour of type zero-zero (Typo 0-0).
Generally, a good strong pizza flour that you can find at your local supermarket, will have a pizza picture on the packet and if they stock a few, the most expensive will be the best. On average, you can make about four pizzas out of one kilogram flour packet, and if you divide the difference per pizza, the extra cost is not really much (usually about 25 cents) which is worth it to have a better pizza dough.
Watch How To Make The Best Homemade Pizza Dough
02 – Activate the yeast with water and add sugar or honey so it can start to make the flour rise by creating air bubbles. In a small bowl, mix 5g of dry yeast with lukewarm water and a teaspoon of sugar, stir until the yeast and sugar are dissolved in the water and set aside for around five to ten minutes until you see bubbles starting to form on the surface.
03 – In a large bowl, add three hundred millilitres of lukewarm water and two teaspoons of salt and stir until the salt is completely dissolved. Add approximately one hundred grams of flour to the salted water and mix until you make a pancake like mixture. This will prevent the salt from contaminating the yeast. Yeast does not like salt.
04 – Add the yeast mixture to the flour and gradually incorporate the rest of the flour while stirring until you have an elastic doughball.
05 – Flour the work surface and press the dough ball. Keep sprinkling flour onto the dough and shape it for a couple of minutes. Flour the bottom of a large mixing bowl and smear a little olive oil on top of the doughball to prevent the pizza dough from forming a skin.
06 – Cover the bowl with a damp towel and set aside in a warm place for two to three hours until it doubles in size.
07 – After the pizza dough has doubled in size, it will become very elastic and full of air bubbles. You now need to knead the dough for approximately ten minutes to get all the air bubbles out. There are many ways to knead the pizza dough and an easy way is to press the dough as you roll it forward until it becomes elongated, then fold it onto itself and start rolling it again.
08 – Cut the pizza dough into two halves and sprinkle a little flour to shape them into 2 dough balls. Flour the bottom of a sealed food container and place the dough balls inside. Refrigerate for twenty four hours.
09 – Gently take out a pizza dough ball and place onto a floured work surface with flour and semolina and start to shape the dough into a pizza base while stretching it.
Semolina are coarse flour balls that help the dough slide. Start by pressing the pizza dough down about 15mm / 1 inch from the outside to form the crust.
Turn the dough round as you stretch it by placing one hand on the inside of the crust and pull in opposite directions using your thumb and fingers of your other hand (watch the video). Be mindful not to have a see-through dough because you may end up having a hole in the dough. Flip the dough over and stretch the other side.
When you finish stretching your pizza dough you will have a perfect pizza base.
If you like this pizza dough recipe, check out the other dinner recipes on the recipes page.
From Italy to France, Greece and many more countries, these desserts qualify for a united nations record for all those passionate about yummy and delightful treats.
Most of these can be made quickly but to truly taste the difference, spend a little more time in the planning and preparations and you will be pleasantly thrilled you did. The only problem you’ll have is which one to make next!
Tiramisu is one of the most famous Italian desserts that you will find in almost every Italian restaurant that serves desserts. It is very light and delicious no-bake dessert combining espresso-dipped ladyfingers and smooth mascarpone cream. The espresso is usually mixed with a little dark rum which you can forget about if you do not wish to have any alcohol, only it will only add a little hint for flavour if you include it in the recipe.
These easy classic French profiteroles are made with choux pastry. They are delicious, very light, filled with vanilla pastry cream and finished with a chocolate glaze. You can have these with cream or ice cream.
This delightful and very delicious classic dessert is famous in every middle eastern country as well as some Mediterranean countries and is certainly a Greek favourite. It is made with layers and layers of flaky phyllo pastry and melted butter, walnuts and pistachios drizzled with honey, this is extremely yummy and comes with “be warned, very addictive health warning”. ????
These chocolate chip cookies are simply irresistible, soft and chewy with crunchy, semi sweet chocolate bits. Chocolate chip cookies are without a doubt one of my favourite desserts. These can be eaten warm or cool, they taste delicious either way, only when warm the chocolate will be melted which the young ones (and some adults too) pick with their fingers and lick it like a sauce.
This delicious chocolate cheesecake is another no-bake dessert that you can easily make at home within a couple of hours and it will be the star of the show at meal time especially if you have young ones and chocolate lovers in the family.
Another French classic that I could eat every day, this is a special dessert that you can make a head and one to impress everyone you invite to dinner with. A smooth and creamy vanilla custard topped with a layer of brittle caramel brings any dinner to a very delicious conclusion.
This dessert is very impressive and is made of three parts which can be made separately before assembling. On the outside you have the chocolate crust, the centre is filled with caramel and the top is covered with chocolate ganache. Very delicious dessert and looks very inviting. I’m sure you’ll agree if you give it a try. With double chocolate and caramel filling, one way to describe this dessert is wicked.
These individual portions of the classic banoffee pie dessert are easy to prepare but saves you time when it comes to serving because they are individual portions. They are adorable little banoffee cups with layers of whipped cream, homemade toffee, sliced bananas and buttery biscuit crumbs topped with chocolate shavings. One of the best things about making these is you can add the individual ingredients in any manner you like and also make them different if you wish, unlike the pie where all slices are the same.
Here is another delicious creamy dessert with a super rich caramel cream cheese. It’s yummy and has a very smooth tasty texture that almost melts in your mouth. It’s worth all the time and effort you spend making it.
If you have a passion for food, cooking or eating and have been contemplating to take your passion a step further, then starting a food blog could be your next stop.
Starting a food blog is relatively easy and can be very rewarding in both following your passion doing something you love as well as in monetizing your food blog. But keeping at it requires passion and commitment and this is where many food bloggers fall short.
Food blogs are highly desirable and frequently visited by people from around the world because they offer free valuable information that can be the reason they would come back to visit your food blog time and again for months and years to come.
There are primarily two types of food blogs, one that shares food recipes and one that blogs about food types, nutrition, diet, travel and also blogging about restaurant visits amongst many different variations and regardless which one you plan to start, you will need your own website to get started.
To start your own website you can go the easy way, which requires investing a few thousand dollars (which is worth the investment if you can afford it, because it will free you to do more important things) by hiring a web designer not to just design the website but to also provide ongoing support for listing your food blog posts/recipes, images, editing, updating and making sure your website functions and looks as you would like it to.
Or the hard way, which is much cheaper, but requires much of your time investment, to not only create and list your posts/recipes but to also learn all the technical stuff required for a website to function correctly as well as look pretty and user friendly.
The good news is, I can help you with both choices, because as well as having experience in creating my own food blog, I am also an experienced web designer.
In this article, I will be detailing the cheaper way which only requires your time and the cost of a cup of coffee and dessert per month to get your food blog up and running, and to put it in monetary terms, it will cost you around $5 per month give or take $1 depending on which hosting plan you choose and that will be the cost of having your dedicated website name and storage space for your website files on the internet.
OK, fasten your seat belt, get ready to take off and let’s have a look at this detailed step by step guide you need to follow to get your food blog started within a few hours.
1- Buy Your Domain Name. A domain name means your website name which is the internet address where visitors can find your food blog, e.g. https://yummytastic.com or https://www.yummytastic.com is the domain name for YummyTastic website. Choose a name related to your blog niche, the shorter the better, easy to remember and easy to spell, avoid numbers, hyphens and underscores in the name because over 50% of your blog visitors will be using mobile phones and that would mean extra work and more possible typing mistakes.
As you can see in the case of YummyTastic, it is one word (hybrid) which is related to food (the yummy part), it is short, easy to remember & spell and has no numbers, hyphens or underscores.
One issue you will come across is that most of the names that follow this formula will have already been taken by someone else, so pace yourself and be patient. I have spent two days on average to come up with some of my websites names and trying to find out if they are available to purchase, but it is totally worth it because, a good domain name will help improve your website traffic and this is one goal every website owner hopes to achieve.
I have used many domain registrars to buy domain names and they all do the same job, however, some are slightly cheaper than others. You’ll be looking at paying around $10 – $15 per year for your domain name and you may get a discount for your first year. I have bought many domain names through Namecheap.com which do a reasonably good job and they are usually cheaper than most. Also, when you click the link above, you could get a discount.
Try to aim for a dot com (.com) tld (top level domain) extension because it is what visitors usually assume your website domain will be and also because on many occasions, you will be referring to your blog without using the full domain name, for example, in my posts I sometimes just write YummyTastic website and readers will automatically assume yummytastic.com, and you will also discover that most professional food blogs will have a dot come tld.
If you are ready to start your website, you could get a free domain name for your first year, check out the next step, (buying a web hosting service) and if you’re not, you need to buy your domain name now before someone else does. A domain name is unique, when someone buys it, nobody else can buy the same domain name.
Once you have decided on your domain name, check the availability by typing the domain name you have chosen into the search bar at Namecheap.com or any other registrar and you should get confirmation within one minute if it is available. Be patient and creative and you will find a suitable domain name for your food blog.
As soon as you find a domain name you like, do not procrastinate, add it to the cart immediately, fill in your payment details and secure your domain name, chances are, someone else maybe thinking to buy the same domain name, so get in there first, the cost of a domain name for a year is not something you will lose sleep over.
How To Buy A Domain Name For Your Food Blog
2- Buy A Web Hosting Service. A web hosting service is where your website files including posts, images, videos, downloads and anything else you create or upload to your website are stored. It is an internet computer storage (server) that lives on the clouds, where your food blog visitors can access by visiting your website.
There are hundreds of web hosting providers. Choose a suitable one for your food blog needs and as you are just starting your food blog, it will take you a few months to get up to speed with many aspects of your food blog including posting, technical stuff and making your website pretty, functional and user friendly, so there is no need to pay top dollar for your web hosting during the learning phase.
I recommend you start with the cheapest shared hosting plan for the initial period (you will get a heavily discounted offer for the initial purchase period which can save you over a hundred dollars), and you will get a refund for any outstanding period remaining on your plan if you decide to upgrade at any time, so it makes a lot of sense to save money by opting for three years instead of one on the outset.
Renewal cost of your web hosting plan will be charged at the standard rate, which is approximately three times the initial cost. Basically, if you pay $3 – $5 per month with your initial plan, this will be $10+ per month when your initial purchase plan expires and that’s comparing current standard monthly rate, which will most likely go up in three years’ time.
One of the top hosting providers is Bluehost.com and it is recommended by WordPress which is the software platform you’ll be using for your food blog if you follow this step by step guide to creating your food blog.
And currently they are offering a fantastic deal for new food blogs as well as a free domain name for the first year, so you will be getting an outstanding deal with great saving. At the time of writing this article, Bluehost has a $2.95 per month plan for the first year or $4.95 per month plan for the first three years with free SSL certificate, as well as not having to pay for your food blog domain name for a whole year, click here to check how much you can save.
How To Buy A Web Hosting Plan For Your Food Blog
3- Install WordPress. WordPress is a content management system that is totally free to use and currently powers 40% of all internet websites and 60% of all content management system type websites. Basically it’s the leader, and for free, you can’t really go wrong using it.
Installing WordPress is a simple process that requires a few clicks and will take under two minutes to be completed. So, within a few minutes of buying your domain name and web hosting service, you’ll be able to start creating your blog posts and sharing them with the whole world.
OK, if you’re new to blogging, there will be a few things to learn before you can start posting if you want to get maximum benefit. You will soon realise that sharing your blog posts and having people coming to your food blog involve a few more things than just creating and sharing. Things like search engine optimisation (SEO) amongst many other things.
To get started, use your login credentials that you received in your welcome email from Bluehost to login to the Bluehost dashboard by clicking the link in the email to arrive at the login screen below.
After you login, click the advanced tab to access the control panel (AKA cPanel).
Once you arrive at the cPanel, scroll down to the software section and select the WordPress Manager by Softaculous.
This will open the WordPress installer page, where you need to enter the user ID and Password to login to your WordPress website and the email address where you would like to receive notifications from your WordPress website and click the install button. Within a minute or two WordPress will be installed on your website.
How To Install WordPress On Your New Food Blog
4- Install Your Food Blog Theme. Choose a theme that is related to your food blog. There are free and paid themes, start with a free one until you need a paid one. Paid themes are charged annually, so get everything you need in place before you subscribe to using a paid theme, this will save you some money.
I have an amazing free theme to get you started with, which can be upgraded to a premium version when your food blog needs require it but until then, you can use it for free. It also has free addons that provide a recipe template and a free recipe card for your food blog.
This basically means, you get an amazing modern theme, recipe website template and recipe card plugin all for free. And just to reassure you, YummyTastic is built with this free theme. As mentioned earlier, I only recommend products I have used and know they can benefit you.
Within 15 minutes including Installing WordPress, I will show you how you can have a fully featured 4 page fully responsive food blog website with header, footer, navigation menu and recipes sub-menus, a recipe card, text paragraphs, social media icons and images, all of which you can replace and customise to suit your needs, and did I forget to mention …..
Yes I did forget to mention ………. it’s all free of charge, with ZERO cost to you, Christmas has come early for your FOOD BLOG, well we’ve had some challenging times lately, I think we all deserve a little break (and for your food blog, I think it’s a big break, still, you deserve it for being here at YummyTastic) and I’m truly happy I can help you.
I will also be recommending a premium recipe card plugin that can import your existing recipes, so when you have everything in place you can upgrade without losing any of your existing recipes.
5- Install Plugins. Simply put, plugins are very similar to the apps you would use on your mobile phone, some add enhancements, looks and cosmetic effects, others offer entirely different functionality and some offer both looks and functionality.
Currently, there are over 50,000 plugins on WordPress.org, which, within a couple of clicks you can add to your website for free. Regardless of what you want to achieve on your WordPress food blog, there are many plugins that will help you achieve the task. Most plugins are free and also have a pro/premium (paid) version.
You get extra options when you upgrade to the premium paid version of a plugin, which benefits both, you and the plugin developer who worked hard to create the free plugin and continues to improve it with regular updates.
There are a few essential plugins for security, backup, SEO, page builder and other important functions that every website needs regardless of what the website niche, design or goals are. Other plugins maybe needed for specific websites and not required for most other websites. You will decide what is important for your food blog and choose the required plugins, but I can help you with the plugins that every website needs.
If anything can go wrong, it will … “Murphy’s Law”. And for this reason alone, you must have a backup plugin so if and when disaster strikes, you don’t have to start from the beginning.
As Mentioned earlier, search engine optimisation (SEO) is important for your food blog if you want people to know your food blog exists, which I believe is the main reason you decided to create your food blog.
As soon as you have your food blog on the internet and even before you create anything, cyber criminals try to find a way to hack your website. I have started to create websites that I have just purchased the domain name for and within 48 hours and before the website is launched, my security plugin reported hacking events.
Before alarm bells start ringing, there are a few steps you can take on the outset including installing a security plugin that will keep your food blog safe from hackers.
How To Install Plugins
Installing plugins for your food blog is almost identical to installing themes, only it is done through the plugins sub-menu instead of the themes sub-menu in your WordPress admin dashboard. Watch the video in the previous step and you’re good to go.
You can also install plugins through the WordPress.org website by downloading them to your computer first, then uploading them to your food blog. Both ways will get you the same result.
Subscribe to Comments Reloaded – Allows commenters to sign up for email notifications of subsequent replies, so they can receive replies to their comment by email.
Tasty Recipes – Excellent recipe card with many different designs.
6- Setup Google Analytics Tools. These tools are totally free and would help you have an idea of what’s happening regarding your website traffic and visitors including where they came from, which website pages they visited, how long they stayed amongst many other parameters that can help you improve your food blog.
This is one piece of the puzzle that most bloggers give little attention to because they don’t fall into the category of having fun creating recipes or blog posts, however, it is important to get as many facts and figures regarding the performance of your food blog so you can react to important matters that require your attention to optimise your food blog performance.
You may want to call this the boring stuff, which as and when you can afford it, you can pay someone to deal with it so you don’t have to. And there are a few plugins you can install that can help you with Google analytics, I use and recommend Monster Insights plugin. The following steps will help you get started with Google Analytics.
7- Create And Share Your Blog Posts/Recipes. Once you have the basic building blocks in place, it’s time to make some noise and shake the World Wide Web (www) with your posts, so people can come to visit your food blog. And, there is no right or wrong here, you can start posting before everything is perfect (according to you), because your perfect maybe totally different from other people’s perspective of what perfect is.
There is noway, anything anyone can do or make, that will be perfect for everyone, so it is a waste of energy, trying to make anything perfect. Utilise your time to benefit you and your audience and that includes the time you spend on things, wasting half a day, trying to make something look prettier is a waste of time.
You could be creating and sharing twice as many recipes/posts that can benefit everyone instead. And this is key to building a large audience base. The more time you have, the more you can create and share, and of course this means more audience which besides making your food blog more popular, it also means more chances of monetisation for your food blog.
8- Promote Your Food Blog. Promoting your food blog means generating awareness on the internet, on social networks, forums, public and private groups and any other place where people who maybe interested in what you have to offer gather together.
This is how you start to build your food blog audience which is what will ultimately make it successful. If you don’t have an audience, nothing else you do matters. I guess you can call your food blog a hobby, but to become a business that generates income for you, you need to work really hard at building your food blog audience.
Generally, there are two main types of promotions for your food blog. Organic or free and paid advertising. Both of which are supposed to help you generate traffic of people to visit your blog. When starting out, it is important to focus on how to get organic traffic because until your food blog becomes a business generating income for you, you will be spending money you haven’t generated yet.
Of course you can start to use paid advertising before you generate any income, but this should only be an option when you have everything in place and you have the mechanism to take advantage of the traffic heading towards your food blog.
The best place to start promoting your food blog is Pinterest because it is the only social platform that allows you to directly link to your food blog free of charge. This means when you create a PIN on Pinterest, you can add the URL (page address) for your post and when people click your pin title, they will arrive at your food blog.
Having said that, you should really allocate some promotional cost for your Pinterest PINs as soon as your food blog is completed. Try spending some money on your favourite posts initially and review your promotional strategy. Getting traffic is key to monetising your food blog.
9- Monetise Your Food Blog. This will be the part where you start to get rewarded for all the time, effort and putting up with the overwhelm, stress and issues you have to deal with, resolve and endure for the pursuit of happiness you seek following your food passion while building your food blog. If you endure, it will be more than worth it.
Monetising your food blog means you will have systems in place that will take advantage of your website visitors by offering products and services that can generate income for you. Examples of these are selling physical products, digital products, services and advertising.
You can sell your own products or other people’s products (affiliate marketing) and you can also offer advertising for Google or other companies. As long as you capitalize on using your food blog traffic to generate income, your food blog will be a successful business and not just a hobby, because if you spend time, energy and effort, you must be paid, so, your food blog can continue running.
The most important thing for you to keep in mind and always stay focused on is, if you do everything to benefit your audience, this is GIVING for free, and everything you give for free to help people will come back to you many times over.
“You will get everything you want in life, if you help enough other people get what they want.” Zig Ziggler
If you decide to create your own WordPress website, you may need some help getting up to speed. I have created a beginners course with over 60 step by step training videos that will help you create your website. Click the link below to check it out.
This Greek salad is one of the most famous and widely used salads in almost every country worldwide. It is delicious, easy to make and has many healthy ingredients. Greece is famous for it’s olives, olive oil, feta cheese and Greek yoghurt. This salad includes three of these ingredients and although it doesn’t include the yoghurt, you could easily have it alongside the salad and they will combine well together.
As it happens, I’m currently staying by the beach on the largest Greek island, the beautiful, sunny Crete and thought what better else to have for dinner than a Greek salad. All the ingredients are available in almost every shop, mini market and supermarket, which leaves no excuses not to make it.
Watch How To Make The Greek Salad And Dressing
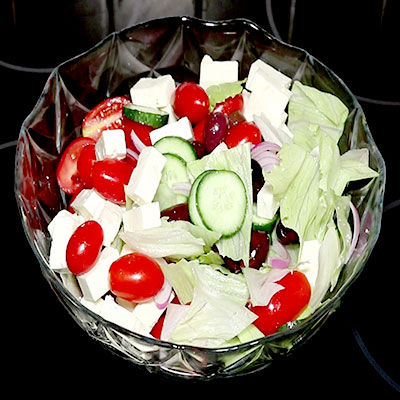
Lets make this yummy Greek salad. Using a large salad bowl, start by chopping the iceberg lettuce into bite size pieces and place them inside the bowl.
Next, slice a Mediterranean cucumber into medium thickness slices and place them on top of the lettuce.
Slice the red onion into thin slices and add them to the lettuce and cucumber.
Toss the black olives on top of the lettuce, cucumber and red onions.
Slice some of the grape tomatoes and toss them on top of the rest of the ingredients already inside the salad bowl.
Cut the feta cheese into bite size blocks and add them on top of all the salad ingredients. Many people and local restaurants in Greece use their hands to squash the feta cheese into small pieces that can be sprinkled on top of the salad ingredients instead of slicing into small blocks. This way, when you add the salad dressing the feta cheese sticks to the other salad ingredients and make them taste cheesy.
Now, using a salad spoon and fork or two large spoons, let’s mix everything and have our delicious Greek salad ready for the easy Mediterranean style salad dressing.
This is a very easy to make, yet very tasty dressing. Using a salad dressing jar, add a tablespoon of extra virgin olive oil, a tablespoon of good quality balsamic vinegar (good quality Italian Aceto Balsamico is available in most supermarkets), a teaspoon of sea salt, a teaspoon of dried oregano and half a teaspoon of freshly ground black pepper (or a teaspoon if you like your salad to have a strong peppery taste).
Using a spoon, mix all the salad dressing ingredients well until the sea salt has melted and drizzle your yummy Greek salad with this tangy salad dressing.
Your Greek salad will stay fresh for longer without the dressing so for best results, add dressing only to the salad you will eat. This is also why I love making this salad dressing, because it takes a couple of minutes to make some extra if you need more dressing.
This Greek salad is very tasty and takes around 15 minutes to make, so you may like to keep these ingredients in your fridge so you can make this salad whenever you want to eat a healthy meal that can be ready in minutes.
More often than not, in Greece people add fresh bell peppers to their Greek salad, so you may like to add some to your salad if you like fresh bell peppers. I love bell peppers, however, I prefer them cooked. This is why, I didn’t include them in this Greek salad. Feel free to experiment making your salad with and without bell peppers to discover which way you prefer it.
This Greek salad is one of the most famous and widely used salads in almost every country worldwide. It is delicious, easy to make and has many healthy ingredients. Greece is famous for it’s olives, olive oil, feta cheese and Greek yoghurt. This salad includes three of these ingredients and although it doesn’t include the yoghurt, you could easily have it alongside the salad and they will combine well together.
Ingredients
Scale
1 Small Iceberg Lettuce
1 Mediterranean Cucumber
1 Small Red Onion
200 g Grape Tomatoes
100 g Black Olives
200 g Feta Cheese
1 tbsp Olive Oil
1 tbsp Balsamic Vinegar
1 tsp Sea Salt
1 tsp Dried Oregano
1/2 tsp Black Pepper
Instructions
Using a large salad bowl, start by chopping the iceberg lettuce into bite size pieces and place them inside the bowl. Next, slice a Mediterranean cucumber into medium thickness slices and place them on top of the lettuce. Slice the red onion into thin slices and add them to the lettuce and cucumber. Toss the black olives on top of the lettuce, cucumber and red onions. Slice some of the grape tomatoes and toss them on top of the rest of the ingredients already inside the salad bowl.
Cut the feta cheese into bite size blocks and add them on top of all the salad ingredients. Many people and local restaurants in Greece use their hands to squash the feta cheese into small pieces that can be sprinkled on top of the salad ingredients instead of slicing into small blocks. This way, when you add the salad dressing the feta cheese sticks to the other salad ingredients and make them taste cheesy.
Using a salad spoon and fork or two large spoons, mix everything and have our delicious Greek salad ready for the easy Mediterranean style salad dressing.
Using a salad dressing jar, add a tablespoon of extra virgin olive oil, a tablespoon of good quality balsamic vinegar (good quality Italian Aceto Balsamico is available in most supermarkets), a teaspoon of sea salt, a teaspoon of dried oregano and half a teaspoon of freshly ground black peppe. Using a spoon, mix all the salad dressing ingredients well until the sea salt has melted and drizzle your yummy Greek salad with this tangy salad dressing.
Notes
Your Greek salad will stay fresh for longer without the dressing so for best results, add dressing only to the salad you will eat. This is also why I love making this salad dressing, because it takes a couple of minutes to make some extra if you need more dressing.
More often than not, in Greece people add fresh bell peppers to their Greek salad, so you may like to add some to your salad if you like fresh bell peppers.
Lets make this amazing, tasty chicken stir fry with yellow basmati rice in under thirty minutes. This is a wonderful homemade meal using delicious vegetables. Very easy to make and very yummy too, you’ll be making this all the time.
If you love rice and chicken you’ll fall in love with this fully loaded chicken stir fry which has so many healthy vegetables. I don’t know about you, but I could eat this almost every day.
Watch How To Make This Chicken Stir Fry
As we all eat with our eyes first, this dish has colourful ingredients that wet your appetite when you look at it. And besides the delightful colours, the array of healthy and tasty vegetables are so inviting for you to make a meal of it, well yummy is one way to describe this chicken stir fry.
Using different colour peppers and red onions certainly add flavour and make this chicken stir fry very tempting. I have also included mushrooms, green beans and carrots which have different colours, taste, texture and compliment the rest of the vegetables.
Lets get started making this delicious chicken stir fry. The rice needs twenty minutes to be perfect and although you can use any type of rice you like, for this dish, I prefer Basmati rice which tastes amazing and handles water better than most different types of rice.
So, we need to start making the rice first, because the preparation and cooking takes just about the same time to get ready and that’s how we can get this meal ready in under thirty minutes. The rice will need a few minutes to be rinsed until the water becomes clear, usually three to five times.
I used one third of each of the three different colour peppers, but you can use one complete peeper instead if you prefer. The onion was divided into two halves, one diced for frying with the garlic and the other half was sliced with the peppers.
The secret to getting the perfect rice which is brewed rather than boiled is to have the correct amount of water and that is, regardless of how much rice you have, covering it with less than one centimeter will be the ideal amount of water.
The next important bit is to make sure the cooking temperature is correct and to achieve that, we bring the water to the boil but making sure as soon as it gets there we cover the pan and bring the cooking temperature down to low, ( Add one tablespoon of olive oil, a small block of butter, a teaspoon of turmeric and a teaspoon of salt before the water starts to boil ).
Using a wooden spoon, turn the rice halfway through (after ten minutes) then cover the pan again for another ten minutes. Check the rice is cooked before serving.
For the stir fry, start by frying half the onion diced in a tablespoon of olive oil on medium/high heat, as they start to brown, add the chopped garlic for thirty seconds, then sizzle the chicken until cooked. Remove the chicken, onions and garlic.
Fry the sliced peppers, onions, carrots, mushrooms and green beans in a tablespoon of olive oil. Add the chicken back into the pan and stir with the vegetables.
Mix a tablespoon of soy sauce with a tablespoon of Worcester sauce in half a cup of warm water and add it to the pan. Fry On high heat.
Add salt, fresh black pepper to taste and a teaspoon of ginger powder, stir until the sauce is reduced and serve with the yellow rice.
Lets make this amazing, tasty chicken stir fry with yellow basmati rice in under thirty minutes. This is a wonderful homemade meal using delicious vegetables. Very easy to make and very yummy too, you’ll be making this all the time.
If you love rice and chicken you’ll fall in love with this fully loaded chicken stir fry which has so many healthy vegetables. I don’t know about you, but I could eat this almost every day.
Ingredients
Scale
1 Large Chicken Breast
1 Large Bell Pepper (or 1/3 of 3 Different Colour Peppers)
2 Small Carrots
8 Mushrooms
1 Medium Onion
2 Garlic Cloves
Half A Cup Green Beans
2 Cups Basmati Rice
3 tbsp Olive Oil
A Small Block Of Butter
1 tsp Turmeric
1 tbsp Soy Sauce
1 tbsp Worcester Sauce
1 tsp Ginger Powder
Salt & Black Pepper To Taste
Instructions
Rinse rice in a saucepan 3 – 5 times until the water is clear, cover with 1 cm water and bring to boil. Add 1 tbsp olive oil, a small block butter and 1 tsp salt. Cover the saucepan and cook for 10 minutes on low heat.
Slice the chicken breast, bell pepper, half of the onion, 2 carrots and 8 mushrooms into quarters. Dice the other half of the onion and chop 2 garlic cloves.
Turn the rice over after 10 minutes, cover & cook for 10 more minutes.
Heat up 1 tbsp olive oil on medium/high, fry the diced onions until they start to brown, add the chopped garlic and fry for 30 seconds. Add the sliced chicken and turn until cooked. Remove the chicken, onions & garlic. Add sliced peppers, onions, carrots, mushrooms & green beans into the frying pan. Fry in 1 tbsp olive oil and stir the vegetables for 3 minutes. Add the chicken, onions & garlic.
Mix the Soy Sauce and Worcester Sauce in half a cup of warm water and add to the pan. Stir fry on high heat until the sauce is reduced to half size. Add 1 tsp ginger powder, salt & fresh black pepper to taste. Stir for 1 minute. Check the rice is cooked and serve. Enjoy your Chicken Stir Fry with Yellow Rice.
Hey fellow foodies, this wonderful chicken biryani dish is one of my all time favourites which I have been making for many years. It is an aromatic rice dish which requires preparation but then, the magic happens when it’s completely cooked.
If you like rice and chicken, you will absolutely fall in love with this aromatic chicken biryani dish and you will not stop eating even after you are full, how do I know this? Because I am still doing it even after all the years I have been cooking it, well, it’s delicious and very tempting.
This is also a dish, that you will find yourself (sampling) every time you go back to the kitchen, assuming you have some biryani left in the pan.
The chicken soup is made naturally from the chicken skin which is then used to cook the rice instead of just normal water and this ads another layer of aroma and flavour which you can’t get from chicken broth or any ready-made ingredients
The spices used are all mild which makes this dish aromatic rather than spicy and this is what separates this dish from the many different spicy chicken dishes.
I only use the chicken breasts, thighs and wings, but the original recipe that MAMA used to make uses the whole chicken. I find it easier to do it my way and you’re welcome to try different variations to arrive at what you prefer.
Watch the video to learn how to cook the aromatic chicken biryani step by step which shows you how easy it is to make this dish.
Watch how to make the Delicious Aromatic Chicken Biryani
You can also check out the recipe card for the list of ingredients and print it to your computer or copy it to your mobile phone for future use.
Another variation that I use with this dish is to brown the vermicelli with the onions before adding the rice which adds colour to the vermicelli, you can try both methods and decide which one you like better.
The preparation includes cutting the chicken to get it into small pieces for easier cooking. The potatoes are cut into small bite size cubes, the onion is cut into two halves, one half is diced for frying and the other half is sliced for the chicken soup. The garlic and root ginger are finely chopped to fry with the diced onions. The final requirement is to shred the chicken and have it ready to add to the rice.
If you buy the chicken from a local butcher, you can ask them to cut it for you which will save you a few minutes in the preparation.
Start by boiling the chicken, because it will take approximately 45 minutes to cook and then you need to let it cool down for at least 10 minutes before you can start to shred the chicken.
While the chicken is cooling down, you can start boiling the potatoes and you can shred the chicken halfway through, so that the chicken is completely shredded when the potatoes are ready.
You can start to fry the onions and get the rice ready after you add the garden peas to the potatoes, then you can add the shredded chicken, potatoes and peas in a timely fashion.
The rice needs to simmer on low heat for 20 minutes and for best results, the rice should only be covered by the chicken soup, this ensures the rice will cook beautifully with just the correct amount of liquid it needs.
This recipe makes enough chicken biryani for four people and I have always made enough for four people even when there were only 2 of us, that meant we had 2 meals each which has never been left for the next day, always finish all the chicken biryani on the same day it’s cooked because it is delicious.
And because it’s so tasty, I have often cooked this aromatic chicken biryani during Easter and Christmas holidays as a special treat.
Hey fellow foodies, this wonderful chicken biryani dish is one of my all time favourites which I have been making for many years. It is an aromatic rice dish which requires preparation but then, the magic happens when it’s completely cooked.
Ingredients
Scale
1 Medium Chicken
500g Basmati Rice
2 Large Potatoes
1 Cup Garden Peas
1 Medium Onion
3 Medium Garlic Cloves
100g Vermicelli
1 tbsp Root Ginger
3 tbsp Coriander Powder
1 tsp Cinnamon Powder
1 tsp Nutmeg Powder
1/2 Cup Olive Oil
4 tsp Salt
1 tsp pepper
Instructions
Cut the chicken into easy to manage pieces and place them in a large saucepan. Rinse the chicken, fill the pan with cold water and bring it to the boil. Use a slotted spoon to skim the rising foam until the soup water becomes clear. Add 1 tsp salt, 1/2 tsp pepper, 1 tsp nutmeg and 1/2 sliced onion. Cover the pan and cook on medium heat for 45 minutes.
Remove the chicken and let it cool down for 10 minutes. Cover the chicken soup and turn the heat down to very low. Cut the potatoes into small cubes and place them in a medium pan. Cover the potato cubes with cold water and add 1 tsp salt. Cover the pan and cook on medium heat for 15 minutes until the potatoes are almost soft. Add garden peas, cover the pan and cook for 5 minutes.
Debone, skin and shred the chicken. Use a colander to drain the water from the potatoes and garden peas. Add 1/2 cup olive oil to a large pan on medium/high heat. Add 1/2 diced onion and stir until they become translucent, add the chopped root ginger and stir for 30 seconds, add the chopped garlic and stir for 30 seconds or before they start to brown. Add 500g basmati rice and stir until the rice has been touched by the oil. Cover the rice with chicken soup and stir.
Add the shredded chicken, potatoes and peas. Add 2 tsp salt, 1/2 tsp pepper, 50g crushed vermicelli, coriander and cinnamon, cover the rice with chicken soup and mix well.
Cover the pan and cook on low heat for 20 minutes, after 15 minutes, add 50g crushed vermicelli to the chicken soup. Cover the soup pan and cook on low for 5 minutes. Check your biryani rice is cooked before serving. Enjoy.
Notes
To save time, prep the potatoes, onion, root ginger and garlic while the chicken is boiling
You Can fry the vermicelli for 30 seconds before adding the rice to give them a brown colour
For a richer chicken soup, you can boil the whole chicken.
Lets make this easy vegetarian mealy lentil soup with mild spices which makes a delightfully filling meal any time of day. And to keep it simple, besides the basic onion and garlic, this soup only has green lentils, vermicelli, vegetable broth and spices, it can’t get any simpler, well it can if you leave out the vermicelli and make it with lentil only, but I love vermicelli, so lets keep it in!!!
This lentil soup is probably one of the easiest soups to make, very healthy, nutritious and pocket friendly too, but as is the case with most soups, they are very filling and much easier to digest, so you get the best of both worlds, healthy and pocket friendly.
To help reduce the cooking time, soak the lentils in water. First rinse the lintels a few times until you get clear water and cover the lentils with cold water for about thirty minutes to an hour. As the lentils are soaked, they start to absorb the water, become softer and easier to cook, taking less time to become ready.
Watch How To Make This Spicy Lentil Soup
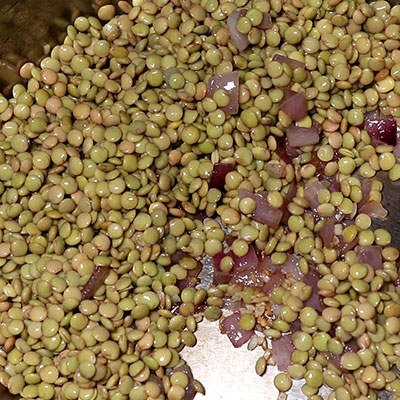
Once you watch this super short video ( just over one minute), you will see how easy it is to make this tasty lintel soup and from the picture below, you can also see the few ingredients that are included.
Although, I love make sauce and rice dishes which take a longer time to prepare, it is far less energy and time consuming to make a delicious soup.
Start by adding one tablespoon of olive oil to a hot pan on medium heat.
Add the diced onions and turn for about three minutes until they become translucent.
Add the chopped garlic and keep turning for thirty seconds to a minute until they soften a little but make sure they don’t become brown, as they will start to have a bitter taste.
Drain the water from the lentils using a fine colander and add them in to the onions and garlic. Turn a few times to help them get a touch of olive oil.
Add 500ml of vegetable broth and turn the heat to high to bring to the boil. Reduce the heat to medium, add the mild curry, turmeric, cumin, ginger powders, salt and pepper. Cover the sauce pan, and cook for fifteen minutes.
Blitz the lentils using a hand blender until you get a smooth puree, add the vermicelli, cover and cook for 5 minutes.
Dish out this nutritious yummy lentil soup and serve it with your favourite bread. I tend to have toasted French stick with most soups as they are crunchy on the outside and soft in the middle which helps when you dip them into the soup and you don’t have bread pieces falling into the soup which you end up having to fish them out. ????
You can also decorate your soup with fresh parsley and shredded cheese.
If you don’t use all the lentil soup you make the same day, don’t worry, this lentil soup tastes even better the next day and the beauty of this is you don’t have to start making the soup all over again, it will take a few minutes to warm it up and you’re in for another treat.
This is why it makes a lot of sense to make more soup than you need, so you can save time energy and money too and while having all these bonuses, you still have a great meal again.
Lets make this easy vegetarian, mealy lentil soup with mild spices which makes a delightfully filling meal any time of day. And to keep it simple, besides the basic onion and garlic, this soup only has green lentils, vermicelli and spices, it can’t get any simpler, well it can if you leave out the vermicelli and make it with lentil only, but I love vermicelli, so lets keep them in.
Ingredients
Scale
2 Cups Lentil
1 Medium Onion
3 Garlic Cloves
50g Vermicelli
2 tsp Mild Curry Powder
1 tsp Turmeric Powder
1 tsp Ginger Powder
1 tsp Cumin Powder
2 tsp Salt
1/2 tsp Pepper
1 tbsp Olive Oil
500ml Vegetable Broth
Instructions
Start by adding one tablespoon of olive oil to a hot pan on medium heat. Add the diced onions and turn for about three minutes until they become translucent. Add the chopped garlic and keep turning for thirty seconds to a minute until they soften a little but make sure they don’t become brown, as they will start to have a bitter taste.
Drain the water from the lentils and add them into the onions and garlic. Turn a few times to help them get a touch of olive oil. Add 500ml of vegetable broth and turn the heat to high to bring to the boil. Reduce the heat to medium, add the mild curry, turmeric, cumin, ginger, salt and pepper.
Cover the sauce pan, and cook for fifteen minutes. Blitz the lentils using a hand blender until you get a smooth puree. Add the vermicelli, cover and cook for 5 minutes.
Dish out this nutritious yummy lentil soup and serve it with your favourite bread. I tend to have toasted French stick with most soups as they are crunchy on the outside and soft in the middle which helps when you dip them into the soup. You can also decorate your soup with fresh parsley and shredded cheese.
Notes
To help reduce the cooking time, soak the lentils in water. First rinse the lintels a few times until you get clear water and cover the lentils with cold water for about thirty minutes to an hour. As the lentils are soaked, they start to absorb the water, become softer and easier to cook, taking less time to become ready.
Prep Time:30 mins
Cook Time:20 mins
Category:Soup
Method:Stove Top
Cuisine:Mediterranean
Nutrition
Serving Size:
Calories:440
Sugar:6.5 g
Sodium:1462.8 mg
Fat:4.9 g
Carbohydrates:77.8 g
Protein:24.5 g
Cholesterol:0 mg
Keywords: Lentil Soup, Vegetarian, Vermicelli
Shopping Cart
Scroll to Top
How Can I Help?
Please send your message to
support [at] IhsanMurad DOT com
I will reply as soon as possible, usually within two business days Mon – Fri
Hello, I'mIhsan
Frequently Asked Questions
How Soon Can You Ship My Item
All items on this website are either digital downloads or available to access online. You will receive a link to the email address you provided during the checkout page.
The item is available for instant download or available for online access.
There will be nothing physical to ship via mail or post.
Can I Cancel My Order
As described in the refund policy, we do not allow order cancellation. All digital sales are final.
Do You Offer Refunds Or Exchange
Due to the nature of our digital downloads, when you make a purchase on our website, you will automatically receive an instant download link through which, you can download the item.
Therefor, a refund can not be offered, because you would have already received the item.
See our refund policy link below.
I have A Problem With My Purchase
If you experience any issues with an item you purchased on our website, please contact our support and we will be very happy to resolve the issues you have.
Send an email describing the issue to
support [at] IhsanMurad DOT com
I Can't Edit The PDF I Purchased
All our PDFs and digital downloads are copyright and password protected and can’t be edited.
Your purchase license entitles you to a personal rights use.
You may not edit, change, recreate, share, give away or resell any of our products, this will be violating copyright and intellectual property laws.
Your support and understanding is highly appreciated.
How To Download
Once your purchase is complete, an automated email will be sent to your registered email address with a link to download your file, (please pay attention to the path where you download your file).
If you face any issues with receiving the automated email, check your spam folder.
If you have any questions or need help, please send an email to
support [at] IhsanMurad DOT com and I’m here to help!
Ihsan
Shipping
All products including Printables and Online Courses are in digital format. This means, there will be no physical items shipped by mail or post. All items are available for instant download, courses videos are available for access online only.