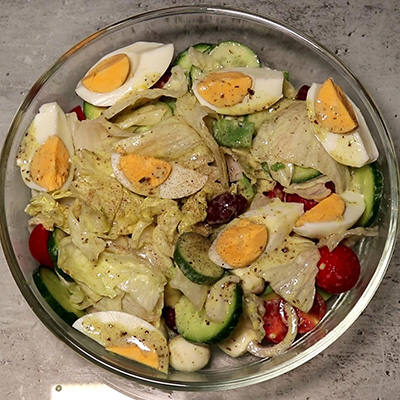
Easy Baby Mozzarella And Cherry Tomatoes Salad

Easy Baby Mozzarella And Cherry Tomatoes Salad Read More »

Favourite, Recipe, Salad, Vegetarian

Here is another tasty and delightfully filling baby mozzarella and cherry tomatoes salad which is completely vegetarian and really easy to make.

This mozzarella and tomatoes salad is traditional and although it is used mostly in the summer months, you can make it in all the other months too because you can find most if not all the ingredients in the supermarkets all year round and you can substitute any ingredient you don’t find with a similar one.
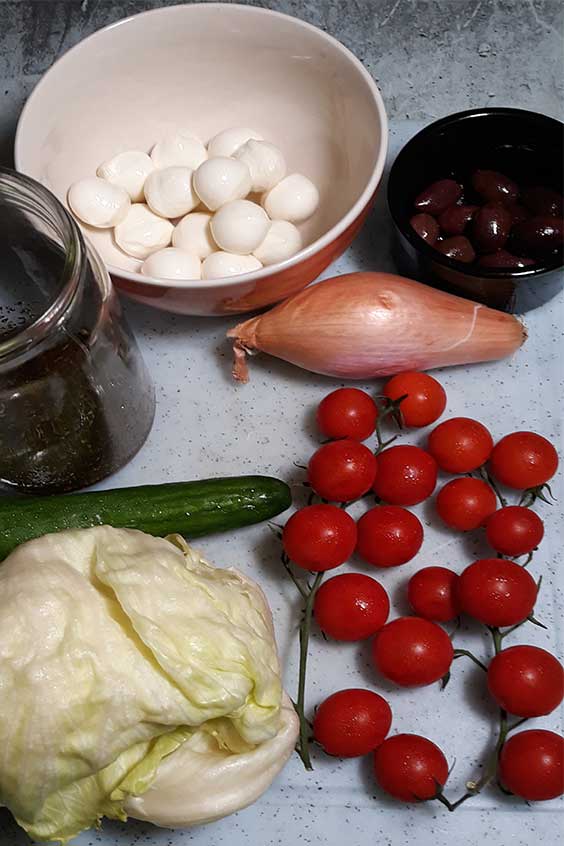
These ingredients are filling and eating the baby mozzarella and cherry tomatoes salad will provide you with energy for hours, so besides having a very healthy salad, you will not be hungry until next mealtime.

To keep this salad really simple, I also used my ready in one minute salad dressing which helps make this mozzarella and tomatoes salad ready in under ten minutes.

Although you can slice the mozzarella balls and the cherry tomatoes, you can leave them as they are because they are bite size. That leaves only the iceberg lettuce, cucumber and onion to be sliced which makes the preparation time less than five minutes.

I usually only slice a few of the cherry tomatoes to make the salad look more appetising, but you can make your own mind about this step, this will only take less than a minute, so you decide which way you prefer.

Use a large bowl for your mozzarella and cherry tomatoes salad and after mixing the ingredients, dish out what you would like to eat in smaller salad bowel before you add the dressing. This will help keep your salad fresh.

Watch How To Make This Baby Mozzarella And Cherry Tomatoes Salad

As you can see from the picture, to make the dressing for the mozzarella and cherry tomatoes salad I only used, olive oil, balsamic vinegar, dried oregano, sea salt and fresh pepper.
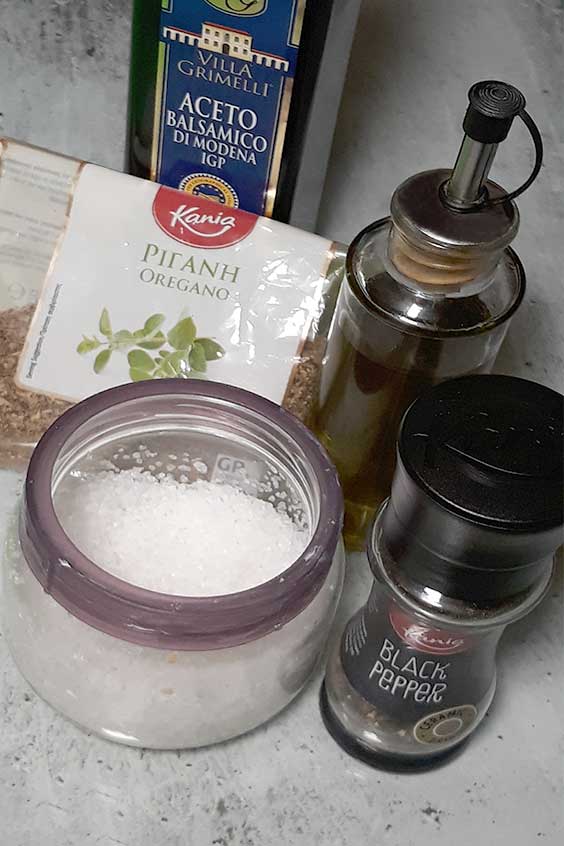
As there are very few ingredients to make this baby mozzarella and cherry tomatoes salad, it is important to use good quality olive oil and balsamic vinegar because they will make your salad taste amazing.

To make this perfect and really easy to make dressing for your baby mozzarella and cherry tomatoes salad, use a dressing jar to mix the dressing ingredients.

Add one tablespoon of olive oil, one tablespoon of balsamic vinegar, a teaspoon of dried oregano, one teaspoon of sea salt and one teaspoon of freshly ground black pepper.

Mix very well for about half a minute to let the sea salt dissolve and use straight away, or give it another mix if you add it later.
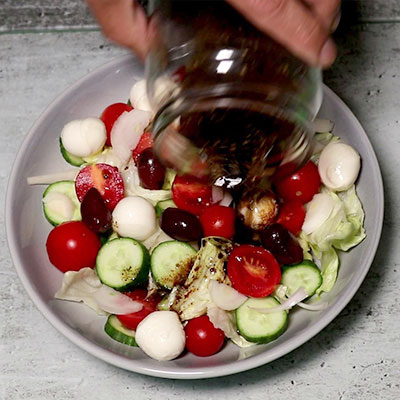
Besides the amazing taste of all the fresh ingredients in this baby mozzarella and cherry tomatoes salad, you will find out how tasty the salad dressing makes your salad tastes which is completely different from not having the dressing on your salad.
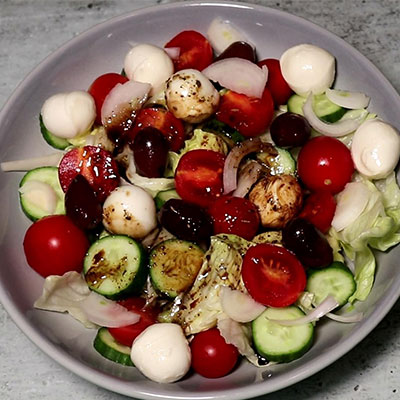
At the time of making this mozzarella and cherry tomatoes salad, I am staying on the Greek island of Crete and as you can see from the picture I have some Greek black olives complete with the pits which make the olives taste amazing.

I have tried this same salad with boiled eggs which adds an extra layer of protein and taste to the salad, but it also makes the preparation time for this salad around twenty minutes. If you like to try this salad with boiled eggs, you may like to boil the eggs earlier in the day or even the day before so that they are ready when you want to make your salad which keeps the salad preparation time under 10 minutes. Well, you can call it cheating with time, but every little helps. The eggs will keep fresh in the fridge, you’ll just be using time to your advantage!!!

Print
clock clock iconcutlery cutlery iconflag flag iconfolder folder iconinstagram instagram iconpinterest pinterest iconfacebook facebook iconprint print iconsquares squares iconheart heart iconheart solid heart solid icon

Easy Baby Mozzarella And Cherry Tomatoes Salad


  • Author: Ihsan
  • Total Time: 10 mins
  • Yield: 2 1x
  • Diet: Vegetarian

Description

Here is another tasty and delightfully filling baby mozzarella and cherry tomatoes salad which is completely vegetarian and really easy to make. This mozzarella and tomatoes salad is traditional and although it is used mostly in the summer months, you can make it in all the other months too because you can find most if not all the ingredients in the supermarkets all year round. You can substitute any ingredient you don’t find with a similar one.


Ingredients

Scale
  • 1 Small Iceberg Lettuce
  • 1 Cucumber
  • 1 Small Onion
  • 200g Cherry Tomatoes
  • 200g Baby Mozzarella Balls
  • 100g Black Olives
  • 1 tbsp Olive Oil
  • 1 tbsp Balsamic Vinegar
  • 1 tsp Sea Salt
  • 1 tsp Dried Oregano
  • 1 tsp Black Pepper

Instructions

  1. Chop the iceberg lettuce into bite size pieces and place in a large salad bowl. Slice the onion into thin slices and scatter on top of the lettuce.
  2. Slice the cucumber into medium size slices and place on top of the lettuce and onions.
  3. Toss the baby mozzarella balls, cherry tomatoes and black olives into the salad bowl.
  4. Use a salad dressing jar to make the salad dressing. Add one tablespoon of olive oil, one tablespoon of balsamic vinegar, one teaspoon of sea salt, one teaspoon of dried oregano and one teaspoon of freshly ground black pepper.
  5. Mix the salad dressing ingredients and shake the jar before sprinkling the dressing on top of the salad.

Notes

  • If you like to have boiled eggs with this salad, you may consider boiling them ahead of time, early in the day or the day before, so they are ready when you start making the salad.
  • You can substitute any of your salad ingredients with a similar one if unavailable.
  • Prep Time: 10 mins
  • Category: Salad
  • Cuisine: Mediterranean

Nutrition

  • Serving Size:
  • Calories: 332
  • Sugar: 10.9 g
  • Sodium: 2299.1 mg
  • Fat: 12.9 g
  • Carbohydrates: 22.9 g
  • Protein: 35.4 g
  • Cholesterol: 18 mg

Keywords: Healthy Salad, Mediterranean Salad

Egg-In-Hole

Best Egg In Hole Breakfast Sandwich

Best Egg In Hole Breakfast Sandwich Read More »

Favourite, Breakfast, Recipe

This egg in hole sandwich is a delicious, full of goodness breakfast. It is so yummy, easy to make and totally vegetarian. It will get your day off to a fantastic start providing you with energy for hours.

Let’s make this yummy egg in hole sandwich for breakfast, or you can have it whenever you like during the day, especially if you have little time to make a quick meal, as it will be ready within ten minutes.

Watch How To Make Egg In Hole Breakfast Sandwich

Start with a large frying pan on medium heat and when it gets to temperature, turn the heat down to medium/low.

Brush a tablespoon of olive oil on the whole surface and add in a tablespoon size of butter block.

Use a silicon spatula to spread the butter while it melts allover the frying pan, so your bread will get buttered and tasted allover. After one minute flip the bread to the other side, crack and pour an egg into the hole.

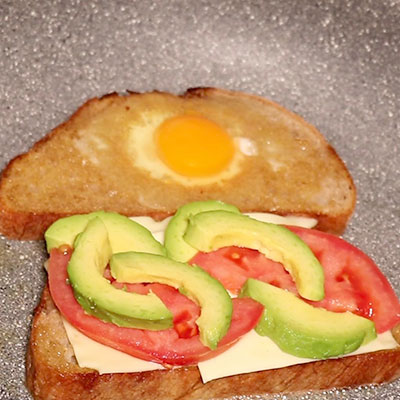
Add two slices of cheese on the second slice.

Cut the large tomato slice into two halves and place them on top of the cheese.

Next, add the avocado on top of the cheese and tomato wherever you find room to squeeze them in.

Cover the pan for two minutes and after the egg white starts to look cooked, remove the lid and sprinkle some salt and fresh pepper to taste.

Using a wide spatula, remove the bread slice with the cheese, tomato and avocado first and place it on a plate. Remove the second bread slice with the egg and stack it on top of the first slice. Using a bread knife, slice the egg in hole into two halves and enjoy your yummy breakfast.

If you like your egg very soft, you can reduce the temperature to low and on the other hand if you like your egg fully cooked, you can turn the heat to medium, as long as you keep the frying pan covered with a lid to let the heat cook the egg top.

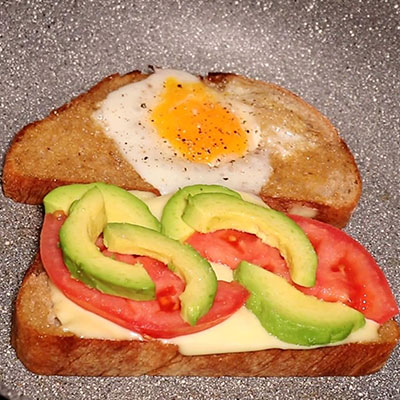
As you can see from the picture the bottom half of the egg is fully cooked while the top is semi soft, which is perfect for an egg sandwich.

Also, you can see the cheese has melted and covered the tomato and avocado which gives them a really yummy taste and make the whole egg in hole sandwich look very appetising.

This breakfast sandwich is almost like a full meal with juicy tomato, the super fruit avocado, melted cheese and protein from the egg, all with a double-decker crunchy toasted bread that not only looks yummy but it tastes amazing too.

All done in about ten minutes, this breakfast will set your day for a great start and give you energy that lasts for hours.

And if you decide to have this egg in hole later on in the day, you can have a couple for lunch or dinner that take so little time to make and won’t break the bank either.

This is my second favourite breakfast that I enjoy making ( and eating ???? ) especially when I’m pushed for time but don’t want to skip breakfast, because lets face it, we’ve all done that and ended up drinking coffees and nibbling on biscuits and other not so healthy quick snacks.

I am not a fan of bacon or any other meat for breakfast, but if you like to add bacon to this egg in hole breakfast, you can lightly heat up the bacon slices first before you place the butter in the pan, put them aside and add them above the cheese slices.

Print
clock clock iconcutlery cutlery iconflag flag iconfolder folder iconinstagram instagram iconpinterest pinterest iconfacebook facebook iconprint print iconsquares squares iconheart heart iconheart solid heart solid icon
Egg-In-Hole

Best Egg In Hole


  • Author: Ihsan
  • Total Time: 10 mins
  • Yield: 1 1x

Description

I am not a fan of bacon or any other meat for breakfast, but if you like to add bacon to this egg in hole breakfast, you can lightly heat up the bacon slices first before you place the butter in the pan, put them aside and add them above the cheese slices.


Ingredients

Scale
  • 2 Slices Sourdough Bread
  • 1 Egg
  • 1 Large Slice Tomato
  • 2 Slices Avocado
  • 2 Slices Cheese
  • 1 tbsp Olive oil
  • 1 Small Block Butter
  • Salt & Pepper To Taste

Instructions

  1. Slice a tomato into 2 halves slightly off centre and make a large slice out of the larger half. Slice an avocado into 2 halves and make small slices out of one half.
  2. Slice 2 large sourdough bread. Use a glass or cookie cutter to make a hole in the centre of one of the bread slices.
  3. Heat up a large frying pan on medium/low, brush 1 tablespoon of olive oil, add a tablespoon of butter and let it melt completely. Toast the bread slices on the butter, flip the bread over after 1 minute. Crack and pour the egg into the hole, add 2 slices of cheese, 1 slice tomato and the sliced avocado.
  4. Cover the pan for 2 minutes ( do not skip this part ). Add salt and pepper to taste. Using a wide spatula, remove the bread slice with cheese tomato and avocado first onto a plate. Remove the second slice of bread with the egg and stack it on top of the first slice.Using a bread knife, slice the sandwich into 2 halves. Enjoy your egg in hole breakfast.

Notes

Use low heat if you want your egg softer, make sure you cover the pan so the top of the egg cooks evenly and remove when the egg white is cooked.

  • Prep Time: 5 mins
  • Cook Time: 5 mins
  • Category: Breakfast
  • Method: Stove Top
  • Cuisine: Mediterranean

Nutrition

  • Serving Size:
  • Calories: 441
  • Sugar: 2.7 g
  • Sodium: 2797.6 mg
  • Fat: 32.4 g
  • Carbohydrates: 24.2 g
  • Protein: 15.1 g
  • Cholesterol: 205 mg

Keywords: Best Breakfast, Sandwich, Egg In Hole, Avocado, Tomato, Delicious

Creamy Chicken And Mushrooms

Easy Creamy Chicken And Mushrooms

Easy Creamy Chicken And Mushrooms Read More »

Favourite, Dinner, Recipe

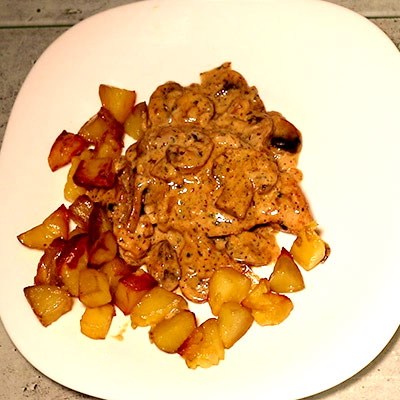
Winner Winner, Juicy Chicken And Mushrooms Dinner. Hey fellow foodies, this is an easy meal you can make anytime you like within 30 minutes. It tastes amazing and will costs you a fraction of the exact meal served in a restaurant, how do I know this? Because we served it in the Italian restaurant I worked at.

I made mushroom sauce and used roast potatoes, but you can use any vegetables you like instead, I have made the same meal with many different vegetables instead of roast potatoes including cauliflower, broccoli, garden peas and green beans amongst many others.

Watch how to make the Creamy Chicken And Mushrooms

One thing you can do to make this meal outstanding is to make the chicken very juicy by keeping it steamed whilst it’s cooking, using a lid to cover the chicken whenever possible to help keep it moist.

This is really a delicious Chicken And Mushrooms meal and the ingredients are very simple and are mostly available in every kitchen. It is an art that you will master with a little practice to make the chicken breast crispy on the outside and juicy in the middle.

Using high heat and a pan with a lid to keep the chicken cooking in steam will help crisp the chicken and keep the moisture.

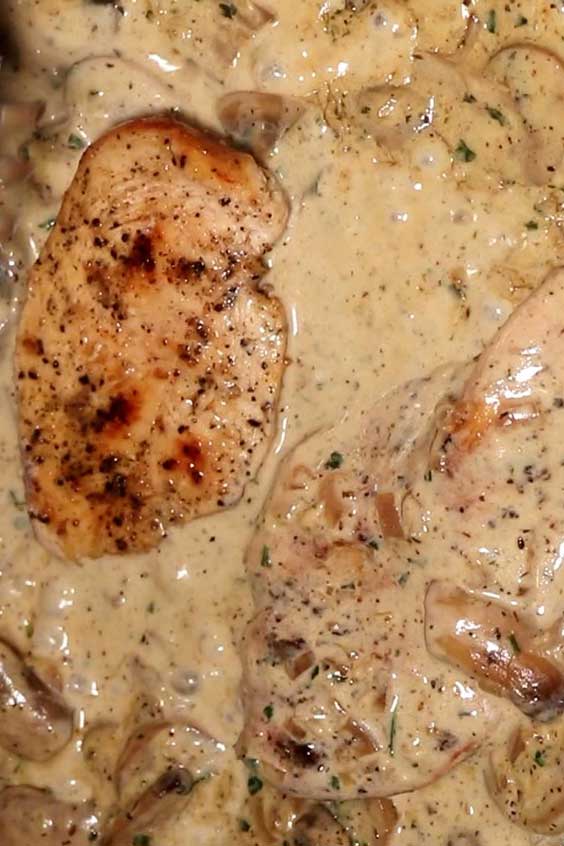
Chicken broth and cream also help to make the chicken tasty and creamy, and a little help comes from the selected herbs and spices, you will eat with your eyes first when you see the mushroom sauce being made, well, this is one of those meals that does that to you.

And when it all comes together, this Chicken And Mushrooms dish looks and tastes so delicious that you would just want to make it again and again. This is one of a very few meals that are really tasty, with high value because it cost so little and it is also so easy to make.

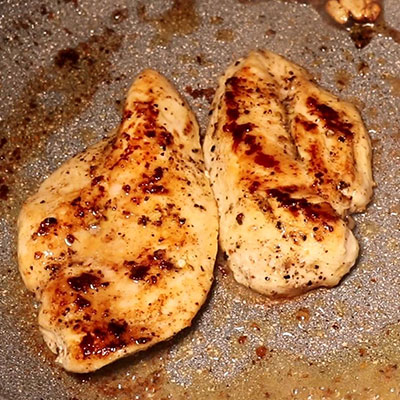
Start by sizzling the chicken on high heat to give it a golden crisp and keep the pan covered whilst you crisp the chicken to help the chicken stay moist, roughly about 3 minutes in total on each side, then remove the chicken aside while you saute the mushrooms and make the creamy sauce.

How To Make The Mushroom Sauce

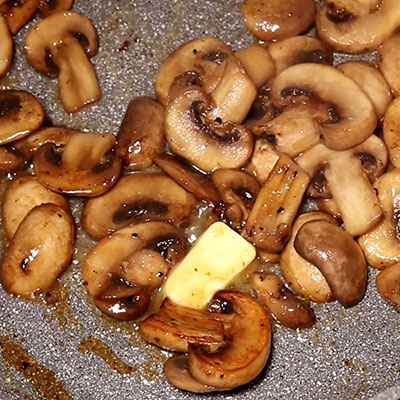
As soon as you remove the chicken from the frying pan toss in the sliced mushrooms into the chicken juices and turn until all the mushrooms get some of the chicken juices. Add a small block of butter to keep the mushrooms sizzling then add the diced onion and onion puree, chopped garlic, dried oregano and cinnamon.

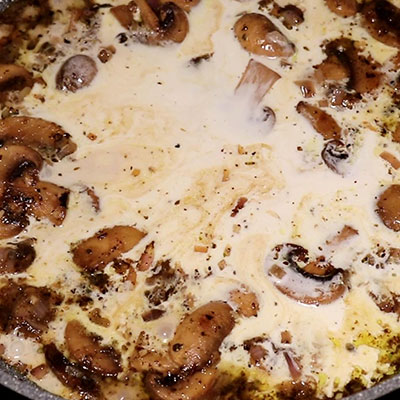
Add a cup of chicken broth, mix it all well to combine all the ingredients, bring it to the boil, then add the cream and the chopped fresh parsley.

Grate a little Parmesan cheese and let the sauce reduce. Then reduce the heat to medium.

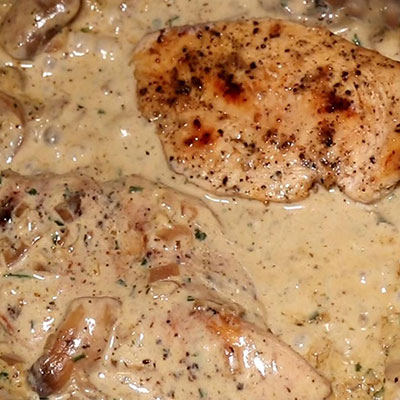
Add the chicken back into the simmering sauce for a couple of minutes turning a couple of time to let the chicken gets smothered by the mushroom sauce.

Dish out the chicken and mushrooms with a little sauce and add the roasted potatoes to have a fantastic juicy chicken and mushroom sauce with crispy potatoes.

This is one of those tasty meals that you can make in under 30 minutes with very little preparations. The roast potatoes take around 25 minutes in the oven, by that time you can slice the chicken breast, chop the onion, garlic and fresh parsley, cook the chicken and mushroom sauce and have everything ready at the same time you remove the roast potatoes from the oven. All you have to do then is devour this amazing and yummy Chicken And Mushrooms meal. Buon Appetito.

Print
clock clock iconcutlery cutlery iconflag flag iconfolder folder iconinstagram instagram iconpinterest pinterest iconfacebook facebook iconprint print iconsquares squares iconheart heart iconheart solid heart solid icon
Creamy Chicken And Mushrooms

Easy Creamy Chicken And Mushrooms


  • Author: Ihsan
  • Total Time: 30
  • Yield: 2 1x

Description

Winner Winner, Juicy Chicken And Mushrooms Dinner. This is an easy meal you can make anytime you like within 30 minutes. It tastes amazing and will costs you a fraction of the exact meal served in a restaurant, how do I know this? Because we served it in the Italian restaurant I worked at.


Ingredients

Scale
  • 1 Large Chicken Breast
  • 200g Mushrooms
  • 4 Small Potatoes
  • 1 Medium Onion
  • 200ml Cream
  • 1 Cup Chicken Broth
  • 3 Clove Garlic
  • 1 tbsp Fresh Parsley
  • 1 tsp Oregano
  • 1/2 tsp Cinnamon
  • 2 tbsp Olive Oil
  • 2 Small Blocks Butter
  • A teaspoon Of Parmesan Cheese
  • Salt & Pepper To Taste

Instructions

  1. Preheat oven to 200 degrees C (approximately 400 degrees F), chop the potatoes into small cubes to help them cook faster. Brush 1 tablespoon olive oil into an oven-safe bowl, add the potatoes and cover with foil paper. Place the potatoes into the oven for 15 minutes, then take them out, turn them and place back in the oven for 10 minutes without the foil paper to let them crisp.
  2. Slice the chicken breast sideways into 2 halves, sprinkle with sea salt and fresh pepper on both sides. Cut the onion into 2 halves, dice one half into small pieces and use a grater to puree the other half. Slice the mushrooms into thick slices, chop 2 garlic cloves and a tablespoon of fresh parsley into fine pieces.
  3. Add 1 tablespoon of olive oil, a small block of butter and a whole clove of garlic into a frying pan. Crisp the chicken for 2 minutes on medium/high heat, sizzle the chicken and cover the pan with a lid for a further minute on each side. Remove the chicken from the pan and put a side to rest. Add the sliced mushrooms into the pan and turn in the leftover chicken juices. Add a small block of butter and continue to turn the mushrooms. Add the diced onion, onion puree, chopped garlic, oregano and cinnamon and mix with the mushrooms.
  4. Dissolve 1 block of chicken broth into a cup of hot water and add it to the frying pan. Mix well. Add the cream, chopped parsley, mix well and bring to the boil. Sprinkle a teaspoon of Parmesan cheese
  5. Reduce the mushroom sauce, add the chicken breast back into the sauce and turn for a couple of minutes. Serve the chicken, mushrooms and sauce with the roast potatoes. Enjoy.

Notes

You can use heavy or whipping cream for the sauce.

  • Prep Time: 5 mins
  • Cook Time: 25 mins
  • Category: Dinner
  • Method: Stove Top & Oven
  • Cuisine: Italian

Nutrition

  • Serving Size:
  • Calories: 474
  • Sugar: 7.1 g
  • Sodium: 1723.9 mg
  • Fat: 39.9 g
  • Carbohydrates: 22.3 g
  • Protein: 11.5 g
  • Cholesterol: 87.2 mg

Keywords: Juicy Chicken, Mushroom Sauce

Greek Salad

Easy Greek Salad With Feta Cheese & Black Olives

Easy Greek Salad With Feta Cheese & Black Olives Read More »

Vegetarian, Favourite, Salad

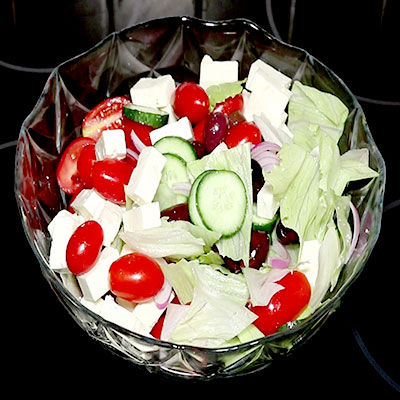
This Greek salad is one of the most famous and widely used salads in almost every country worldwide. It is delicious, easy to make and has many healthy ingredients. Greece is famous for it’s olives, olive oil, feta cheese and Greek yoghurt. This salad includes three of these ingredients and although it doesn’t include the yoghurt, you could easily have it alongside the salad and they will combine well together.

As it happens, I’m currently staying by the beach on the largest Greek island, the beautiful, sunny Crete and thought what better else to have for dinner than a Greek salad. All the ingredients are available in almost every shop, mini market and supermarket, which leaves no excuses not to make it.

Watch How To Make The Greek Salad And Dressing

Lets make this yummy Greek salad. Using a large salad bowl, start by chopping the iceberg lettuce into bite size pieces and place them inside the bowl.

Next, slice a Mediterranean cucumber into medium thickness slices and place them on top of the lettuce.

Slice the red onion into thin slices and add them to the lettuce and cucumber.

Toss the black olives on top of the lettuce, cucumber and red onions.

Slice some of the grape tomatoes and toss them on top of the rest of the ingredients already inside the salad bowl.

Cut the feta cheese into bite size blocks and add them on top of all the salad ingredients. Many people and local restaurants in Greece use their hands to squash the feta cheese into small pieces that can be sprinkled on top of the salad ingredients instead of slicing into small blocks. This way, when you add the salad dressing the feta cheese sticks to the other salad ingredients and make them taste cheesy.

Now, using a salad spoon and fork or two large spoons, let’s mix everything and have our delicious Greek salad ready for the easy Mediterranean style salad dressing.

This is a very easy to make, yet very tasty dressing. Using a salad dressing jar, add a tablespoon of extra virgin olive oil, a tablespoon of good quality balsamic vinegar (good quality Italian Aceto Balsamico is available in most supermarkets), a teaspoon of sea salt, a teaspoon of dried oregano and half a teaspoon of freshly ground black pepper (or a teaspoon if you like your salad to have a strong peppery taste).

Using a spoon, mix all the salad dressing ingredients well until the sea salt has melted and drizzle your yummy Greek salad with this tangy salad dressing.

Your Greek salad will stay fresh for longer without the dressing so for best results, add dressing only to the salad you will eat. This is also why I love making this salad dressing, because it takes a couple of minutes to make some extra if you need more dressing.

This Greek salad is very tasty and takes around 15 minutes to make, so you may like to keep these ingredients in your fridge so you can make this salad whenever you want to eat a healthy meal that can be ready in minutes.

More often than not, in Greece people add fresh bell peppers to their Greek salad, so you may like to add some to your salad if you like fresh bell peppers. I love bell peppers, however, I prefer them cooked. This is why, I didn’t include them in this Greek salad. Feel free to experiment making your salad with and without bell peppers to discover which way you prefer it.

Print
clock clock iconcutlery cutlery iconflag flag iconfolder folder iconinstagram instagram iconpinterest pinterest iconfacebook facebook iconprint print iconsquares squares iconheart heart iconheart solid heart solid icon
Greek Salad

Easy Greek Salad With Feta Cheese & Black Olives


  • Author: Ihsan
  • Total Time: 15 minutes
  • Yield: 4 1x

Description

This Greek salad is one of the most famous and widely used salads in almost every country worldwide. It is delicious, easy to make and has many healthy ingredients. Greece is famous for it’s olives, olive oil, feta cheese and Greek yoghurt. This salad includes three of these ingredients and although it doesn’t include the yoghurt, you could easily have it alongside the salad and they will combine well together.


Ingredients

Scale
  • 1 Small Iceberg Lettuce
  • 1 Mediterranean Cucumber
  • 1 Small Red Onion
  • 200 g Grape Tomatoes
  • 100 g Black Olives
  • 200 g Feta Cheese
  • 1 tbsp Olive Oil
  • 1 tbsp Balsamic Vinegar
  • 1 tsp Sea Salt
  • 1 tsp Dried Oregano
  • 1/2 tsp Black Pepper

Instructions

  1. Using a large salad bowl, start by chopping the iceberg lettuce into bite size pieces and place them inside the bowl. Next, slice a Mediterranean cucumber into medium thickness slices and place them on top of the lettuce. Slice the red onion into thin slices and add them to the lettuce and cucumber. Toss the black olives on top of the lettuce, cucumber and red onions. Slice some of the grape tomatoes and toss them on top of the rest of the ingredients already inside the salad bowl.
  2. Cut the feta cheese into bite size blocks and add them on top of all the salad ingredients. Many people and local restaurants in Greece use their hands to squash the feta cheese into small pieces that can be sprinkled on top of the salad ingredients instead of slicing into small blocks. This way, when you add the salad dressing the feta cheese sticks to the other salad ingredients and make them taste cheesy.
  3. Using a salad spoon and fork or two large spoons, mix everything and have our delicious Greek salad ready for the easy Mediterranean style salad dressing.
  4. Using a salad dressing jar, add a tablespoon of extra virgin olive oil, a tablespoon of good quality balsamic vinegar (good quality Italian Aceto Balsamico is available in most supermarkets), a teaspoon of sea salt, a teaspoon of dried oregano and half a teaspoon of freshly ground black peppe. Using a spoon, mix all the salad dressing ingredients well until the sea salt has melted and drizzle your yummy Greek salad with this tangy salad dressing.

Notes

  • Your Greek salad will stay fresh for longer without the dressing so for best results, add dressing only to the salad you will eat. This is also why I love making this salad dressing, because it takes a couple of minutes to make some extra if you need more dressing.
  • More often than not, in Greece people add fresh bell peppers to their Greek salad, so you may like to add some to your salad if you like fresh bell peppers.


  • Prep Time: 15 minutes
  • Category: Salad
  • Cuisine: Greek

Nutrition

  • Serving Size:
  • Calories: 227
  • Sugar: 6.7 g
  • Sodium: 1236.5 mg
  • Fat: 17.1 g
  • Carbohydrates: 11.6 g
  • Protein: 8.9 g
  • Cholesterol: 44.5 mg

Keywords: Greek Salad, Healthy Salad, Vegetarian

Chicken Stir Fry

Easy Chicken Stir Fry With Yellow Rice

Easy Chicken Stir Fry With Yellow Rice Read More »

Favourite, Chicken, Dinner, Lunch

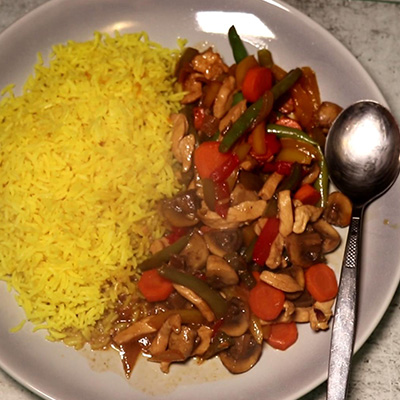
Lets make this amazing, tasty chicken stir fry with yellow basmati rice in under thirty minutes. This is a wonderful homemade meal using delicious vegetables. Very easy to make and very yummy too, you’ll be making this all the time.

Chicken Stir Fry

If you love rice and chicken you’ll fall in love with this fully loaded chicken stir fry which has so many healthy vegetables. I don’t know about you, but I could eat this almost every day.

Watch How To Make This Chicken Stir Fry

As we all eat with our eyes first, this dish has colourful ingredients that wet your appetite when you look at it. And besides the delightful colours, the array of healthy and tasty vegetables are so inviting for you to make a meal of it, well yummy is one way to describe this chicken stir fry.

Using different colour peppers and red onions certainly add flavour and make this chicken stir fry very tempting. I have also included mushrooms, green beans and carrots which have different colours, taste, texture and compliment the rest of the vegetables.

Lets get started making this delicious chicken stir fry. The rice needs twenty minutes to be perfect and although you can use any type of rice you like, for this dish, I prefer Basmati rice which tastes amazing and handles water better than most different types of rice.

So, we need to start making the rice first, because the preparation and cooking takes just about the same time to get ready and that’s how we can get this meal ready in under thirty minutes. The rice will need a few minutes to be rinsed until the water becomes clear, usually three to five times.

I used one third of each of the three different colour peppers, but you can use one complete peeper instead if you prefer. The onion was divided into two halves, one diced for frying with the garlic and the other half was sliced with the peppers.

The secret to getting the perfect rice which is brewed rather than boiled is to have the correct amount of water and that is, regardless of how much rice you have, covering it with less than one centimeter will be the ideal amount of water.

The next important bit is to make sure the cooking temperature is correct and to achieve that, we bring the water to the boil but making sure as soon as it gets there we cover the pan and bring the cooking temperature down to low, ( Add one tablespoon of olive oil, a small block of butter, a teaspoon of turmeric and a teaspoon of salt before the water starts to boil ).

Using a wooden spoon, turn the rice halfway through (after ten minutes) then cover the pan again for another ten minutes. Check the rice is cooked before serving.

Chicken Stir Fry

For the stir fry, start by frying half the onion diced in a tablespoon of olive oil on medium/high heat, as they start to brown, add the chopped garlic for thirty seconds, then sizzle the chicken until cooked. Remove the chicken, onions and garlic.

Fry the sliced peppers, onions, carrots, mushrooms and green beans in a tablespoon of olive oil. Add the chicken back into the pan and stir with the vegetables.

Mix a tablespoon of soy sauce with a tablespoon of Worcester sauce in half a cup of warm water and add it to the pan. Fry On high heat.

Add salt, fresh black pepper to taste and a teaspoon of ginger powder, stir until the sauce is reduced and serve with the yellow rice.

Print
clock clock iconcutlery cutlery iconflag flag iconfolder folder iconinstagram instagram iconpinterest pinterest iconfacebook facebook iconprint print iconsquares squares iconheart heart iconheart solid heart solid icon
Chicken Stir Fry

Easy Chicken Stir Fry With Yellow Rice


  • Author: Ihsan
  • Total Time: 30 mins
  • Yield: 2 1x

Description

Lets make this amazing, tasty chicken stir fry with yellow basmati rice in under thirty minutes. This is a wonderful homemade meal using delicious vegetables. Very easy to make and very yummy too, you’ll be making this all the time.

If you love rice and chicken you’ll fall in love with this fully loaded chicken stir fry which has so many healthy vegetables. I don’t know about you, but I could eat this almost every day.


Ingredients

Scale
  • 1 Large Chicken Breast
  • 1 Large Bell Pepper (or 1/3 of 3 Different Colour Peppers)
  • 2 Small Carrots
  • 8 Mushrooms
  • 1 Medium Onion
  • 2 Garlic Cloves
  • Half A Cup Green Beans
  • 2 Cups Basmati Rice
  • 3 tbsp Olive Oil
  • A Small Block Of Butter
  • 1 tsp Turmeric
  • 1 tbsp Soy Sauce
  • 1 tbsp Worcester Sauce
  • 1 tsp Ginger Powder
  • Salt & Black Pepper To Taste

Instructions

  1. Rinse rice in a saucepan 3 – 5 times until the water is clear, cover with 1 cm water and bring to boil. Add 1 tbsp olive oil, a small block butter and 1 tsp salt. Cover the saucepan and cook for 10 minutes on low heat.
  2. Slice the chicken breast, bell pepper, half of the onion, 2 carrots and 8 mushrooms into quarters. Dice the other half of the onion and chop 2 garlic cloves.
  3. Turn the rice over after 10 minutes, cover & cook for 10 more minutes.
  4. Heat up 1 tbsp olive oil on medium/high, fry the diced onions until they start to brown, add the chopped garlic and fry for 30 seconds. Add the sliced chicken and turn until cooked. Remove the chicken, onions & garlic. Add sliced peppers, onions, carrots, mushrooms & green beans into the frying pan. Fry in 1 tbsp olive oil and stir the vegetables for 3 minutes. Add the chicken, onions & garlic.
  5. Mix the Soy Sauce and Worcester Sauce in half a cup of warm water and add to the pan.  Stir fry on high heat until the sauce is reduced to half size. Add 1 tsp ginger powder, salt & fresh black pepper to taste. Stir for 1 minute. Check the rice is cooked and serve. Enjoy your Chicken Stir Fry with Yellow Rice.
  • Prep Time: 5 mins
  • Cook Time: 25 mins
  • Category: Dinner
  • Method: Stove Top
  • Cuisine: Middle Eastern

Nutrition

  • Serving Size:
  • Calories: 653
  • Sugar: 15.5 g
  • Sodium: 1677.3 mg
  • Fat: 29.1 g
  • Carbohydrates: 83.7 g
  • Protein: 20.3 g
  • Cholesterol: 25.6 mg

Keywords: Stir Fry Chicken, Yellow Basmati Rice

Chicken Biryani

Easy Aromatic Chicken Biryani & Tasty Soup

Easy Aromatic Chicken Biryani & Tasty Soup Read More »

Dinner, Favourite, Lunch

Hey fellow foodies, this wonderful chicken biryani dish is one of my all time favourites which I have been making for many years. It is an aromatic rice dish which requires preparation but then, the magic happens when it’s completely cooked.

If you like rice and chicken, you will absolutely fall in love with this aromatic chicken biryani dish and you will not stop eating even after you are full, how do I know this? Because I am still doing it even after all the years I have been cooking it, well, it’s delicious and very tempting.

This is also a dish, that you will find yourself (sampling) every time you go back to the kitchen, assuming you have some biryani left in the pan.

The chicken soup is made naturally from the chicken skin which is then used to cook the rice instead of just normal water and this ads another layer of aroma and flavour which you can’t get from chicken broth or any ready-made ingredients

The spices used are all mild which makes this dish aromatic rather than spicy and this is what separates this dish from the many different spicy chicken dishes.

I only use the chicken breasts, thighs and wings, but the original recipe that MAMA used to make uses the whole chicken. I find it easier to do it my way and you’re welcome to try different variations to arrive at what you prefer.

Watch the video to learn how to cook the aromatic chicken biryani step by step which shows you how easy it is to make this dish.

Watch how to make the Delicious Aromatic Chicken Biryani

You can also check out the recipe card for the list of ingredients and print it to your computer or copy it to your mobile phone for future use.

Another variation that I use with this dish is to brown the vermicelli with the onions before adding the rice which adds colour to the vermicelli, you can try both methods and decide which one you like better.

The preparation includes cutting the chicken to get it into small pieces for easier cooking. The potatoes are cut into small bite size cubes, the onion is cut into two halves, one half is diced for frying and the other half is sliced for the chicken soup. The garlic and root ginger are finely chopped to fry with the diced onions. The final requirement is to shred the chicken and have it ready to add to the rice.

If you buy the chicken from a local butcher, you can ask them to cut it for you which will save you a few minutes in the preparation.

Start by boiling the chicken, because it will take approximately 45 minutes to cook and then you need to let it cool down for at least 10 minutes before you can start to shred the chicken.

While the chicken is cooling down, you can start boiling the potatoes and you can shred the chicken halfway through, so that the chicken is completely shredded when the potatoes are ready.

You can start to fry the onions and get the rice ready after you add the garden peas to the potatoes, then you can add the shredded chicken, potatoes and peas in a timely fashion.

The rice needs to simmer on low heat for 20 minutes and for best results, the rice should only be covered by the chicken soup, this ensures the rice will cook beautifully with just the correct amount of liquid it needs.

This recipe makes enough chicken biryani for four people and I have always made enough for four people even when there were only 2 of us, that meant we had 2 meals each which has never been left for the next day, always finish all the chicken biryani on the same day it’s cooked because it is delicious.

And because it’s so tasty, I have often cooked this aromatic chicken biryani during Easter and Christmas holidays as a special treat.

Print
clock clock iconcutlery cutlery iconflag flag iconfolder folder iconinstagram instagram iconpinterest pinterest iconfacebook facebook iconprint print iconsquares squares iconheart heart iconheart solid heart solid icon
Chicken Biryani

Easy Aromatic Chicken Biryani & Tasty Soup


  • Author: Ihsan
  • Total Time: 1 hr 40 mins
  • Yield: 4 1x

Description

Hey fellow foodies, this wonderful chicken biryani dish is one of my all time favourites which I have been making for many years. It is an aromatic rice dish which requires preparation but then, the magic happens when it’s completely cooked.


Ingredients

Scale
  • 1 Medium Chicken
  • 500g Basmati Rice
  • 2 Large Potatoes
  • 1 Cup Garden Peas
  • 1 Medium Onion
  • 3 Medium Garlic Cloves
  • 100g Vermicelli
  • 1 tbsp Root Ginger
  • 3 tbsp Coriander Powder
  • 1 tsp Cinnamon Powder
  • 1 tsp Nutmeg Powder
  • 1/2 Cup Olive Oil
  • 4 tsp Salt
  • 1 tsp pepper

Instructions

  1. Cut the chicken into easy to manage pieces and place them in a large saucepan. Rinse the chicken, fill the pan with cold water and bring it to the boil. Use a slotted spoon to skim the rising foam until the soup water becomes clear. Add 1 tsp salt, 1/2 tsp pepper, 1 tsp nutmeg and 1/2 sliced onion. Cover the pan and cook on medium heat for 45 minutes.
  2. Remove the chicken and let it cool down for 10 minutes. Cover the chicken soup and turn the heat down to very low. Cut the potatoes into small cubes and place them in a medium pan. Cover the potato cubes with cold water and add 1 tsp salt. Cover the pan and cook on medium heat for 15 minutes until the potatoes are almost soft. Add garden peas, cover the pan and cook for 5 minutes.
  3. Debone, skin and shred the chicken. Use a colander to drain the water from the potatoes and garden peas. Add 1/2 cup olive oil to a large pan on medium/high heat. Add 1/2 diced onion and stir until they become translucent, add the chopped root ginger and stir for 30 seconds, add the chopped garlic and stir for 30 seconds or before they start to brown. Add 500g basmati rice and stir until the rice has been touched by the oil. Cover the rice with chicken soup and stir.
  4. Add the shredded chicken, potatoes and peas. Add 2 tsp salt, 1/2 tsp pepper, 50g crushed vermicelli, coriander and cinnamon, cover the rice with chicken soup and mix well.
  5. Cover the pan and cook on low heat for 20 minutes, after 15 minutes, add 50g crushed vermicelli to the chicken soup. Cover the soup pan and cook on low for 5 minutes. Check your biryani rice is cooked before serving. Enjoy.

Notes

To save time, prep the potatoes, onion, root ginger and garlic while the chicken is boiling

You Can fry the vermicelli for 30 seconds before adding the rice to give them a brown colour

For a richer chicken soup, you can boil the whole chicken.

  • Prep Time: 10 mins
  • Cook Time: 1 hr 30 mins
  • Category: Dinner
  • Method: Stove Top
  • Cuisine: Middle Eastern

Nutrition

  • Serving Size:
  • Calories: 820
  • Sugar: 10.5 g
  • Sodium: 2417.5 mg
  • Fat: 29.4 g
  • Carbohydrates: 128.6 g
  • Protein: 16.8 g
  • Cholesterol: 5.2 mg

Keywords: Aromatic, Chicken Biryani, Basmati Rice

Spicy Lentil Soup

Easy Spicy Lentil Soup With Vermicelli

Easy Spicy Lentil Soup With Vermicelli Read More »

Vegetarian, Favourite, soup

Lets make this easy vegetarian mealy lentil soup with mild spices which makes a delightfully filling meal any time of day. And to keep it simple, besides the basic onion and garlic, this soup only has green lentils, vermicelli, vegetable broth and spices, it can’t get any simpler, well it can if you leave out the vermicelli and make it with lentil only, but I love vermicelli, so lets keep it in!!!

This lentil soup is probably one of the easiest soups to make, very healthy, nutritious and pocket friendly too, but as is the case with most soups, they are very filling and much easier to digest, so you get the best of both worlds, healthy and pocket friendly.

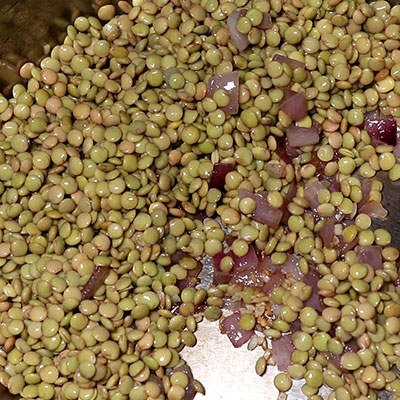
To help reduce the cooking time, soak the lentils in water. First rinse the lintels a few times until you get clear water and cover the lentils with cold water for about thirty minutes to an hour. As the lentils are soaked, they start to absorb the water, become softer and easier to cook, taking less time to become ready.

Watch How To Make This Spicy Lentil Soup

Once you watch this super short video ( just over one minute), you will see how easy it is to make this tasty lintel soup and from the picture below, you can also see the few ingredients that are included.

Although, I love make sauce and rice dishes which take a longer time to prepare, it is far less energy and time consuming to make a delicious soup.

Start by adding one tablespoon of olive oil to a hot pan on medium heat.

Add the diced onions and turn for about three minutes until they become translucent.

Add the chopped garlic and keep turning for thirty seconds to a minute until they soften a little but make sure they don’t become brown, as they will start to have a bitter taste.

Drain the water from the lentils using a fine colander and add them in to the onions and garlic. Turn a few times to help them get a touch of olive oil.

Add 500ml of vegetable broth and turn the heat to high to bring to the boil. Reduce the heat to medium, add the mild curry, turmeric, cumin, ginger powders, salt and pepper. Cover the sauce pan, and cook for fifteen minutes.

Blitz the lentils using a hand blender until you get a smooth puree, add the vermicelli, cover and cook for 5 minutes.

Dish out this nutritious yummy lentil soup and serve it with your favourite bread. I tend to have toasted French stick with most soups as they are crunchy on the outside and soft in the middle which helps when you dip them into the soup and you don’t have bread pieces falling into the soup which you end up having to fish them out. ????

You can also decorate your soup with fresh parsley and shredded cheese.

Spicy Lentil Soup

If you don’t use all the lentil soup you make the same day, don’t worry, this lentil soup tastes even better the next day and the beauty of this is you don’t have to start making the soup all over again, it will take a few minutes to warm it up and you’re in for another treat.

This is why it makes a lot of sense to make more soup than you need, so you can save time energy and money too and while having all these bonuses, you still have a great meal again.

Print
clock clock iconcutlery cutlery iconflag flag iconfolder folder iconinstagram instagram iconpinterest pinterest iconfacebook facebook iconprint print iconsquares squares iconheart heart iconheart solid heart solid icon
Spicy Lentil Soup

Easy Spicy Lentil Soup With Vermicelli


  • Author: Ihsan
  • Total Time: 50 mins
  • Yield: 4 1x
  • Diet: Vegetarian

Description

Lets make this easy vegetarian, mealy lentil soup with mild spices which makes a delightfully filling meal any time of day. And to keep it simple, besides the basic onion and garlic, this soup only has green lentils, vermicelli and spices, it can’t get any simpler, well it can if you leave out the vermicelli and make it with lentil only, but I love vermicelli, so lets keep them in.


Ingredients

Scale
  • 2 Cups Lentil
  • 1 Medium Onion
  • 3 Garlic Cloves
  • 50g Vermicelli
  • 2 tsp Mild Curry Powder
  • 1 tsp Turmeric Powder
  • 1 tsp Ginger Powder
  • 1 tsp Cumin Powder
  • 2 tsp Salt
  • 1/2 tsp Pepper
  • 1 tbsp Olive Oil
  • 500ml Vegetable Broth

Instructions

  1. Start by adding one tablespoon of olive oil to a hot pan on medium heat. Add the diced onions and turn for about three minutes until they become translucent. Add the chopped garlic and keep turning for thirty seconds to a minute until they soften a little but make sure they don’t become brown, as they will start to have a bitter taste.
  2. Drain the water from the lentils and add them into the onions and garlic. Turn a few times to help them get a touch of olive oil. Add 500ml of vegetable broth and turn the heat to high to bring to the boil. Reduce the heat to medium, add the mild curry, turmeric, cumin, ginger, salt and pepper.
  3. Cover the sauce pan, and cook for fifteen minutes. Blitz the lentils using a hand blender until you get a smooth puree. Add the vermicelli, cover and cook for 5 minutes.
  4. Dish out this nutritious yummy lentil soup and serve it with your favourite bread. I tend to have toasted French stick with most soups as they are crunchy on the outside and soft in the middle which helps when you dip them into the soup. You can also decorate your soup with fresh parsley and shredded cheese.

Notes

To help reduce the cooking time, soak the lentils in water. First rinse the lintels a few times until you get clear water and cover the lentils with cold water for about thirty minutes to an hour. As the lentils are soaked, they start to absorb the water, become softer and easier to cook, taking less time to become ready.

  • Prep Time: 30 mins
  • Cook Time: 20 mins
  • Category: Soup
  • Method: Stove Top
  • Cuisine: Mediterranean

Nutrition

  • Serving Size:
  • Calories: 440
  • Sugar: 6.5 g
  • Sodium: 1462.8 mg
  • Fat: 4.9 g
  • Carbohydrates: 77.8 g
  • Protein: 24.5 g
  • Cholesterol: 0 mg

Keywords: Lentil Soup, Vegetarian, Vermicelli

Best Mediterranean Chicken Salad With Tasty Avocado

Best Mediterranean Chicken Salad With Tasty Avocado Read More »

Favourite, Chicken, Dinner, Lunch, Recipe, Salad

You can have this Mediterranean Style Chicken Salad for lunch or dinner any day of the week, it is delicious, very filling and is ready within 30 minutes. This Chicken Salad will make a healthy meal for 4 people and besides tasting yummy, it is pocket friendly too.

Using fresh and super fruits like avocado and vegetables in your salads is not only always a good idea, but it helps when you decide you want to add chicken, red meat or seafood to your salad to get your daily protein.
Watch How To Make This Mediterranean Chicken Salad

As you can seen from the pictures this salad is loaded with as many healthy ingredients that will be excellent source of energy and will help prevent you from nibbling on things you’d rather avoid.

I could eat this as many times a week as I can make it and 30 minutes is not exactly a long time to prepare a great meal that has the best of both worlds, healthy and tasty.

Of course you can tweak this salad to suit you in many different ways, change the fruit, vegetables and have a different meat instead of chicken. The idea is the same, you just let your creativity and imagination take control and the sky is not the limit, you can go as far as you would like to go.

To make this delicious chicken salad, start by boiling the eggs because they take up to twenty minutes including cooling time which is excellent as everything else should be getting ready during that time.

While the eggs are boiling, you can start making the marinade for the chicken and this marinade will make your chicken look appetising as well as taste amazing. There is an array of spices that will make this marinade ready to be used without letting it sit in the fridge for hours or over night, this is desirable but not necessary.

Once you have combined the marinade, add the chicken breast pieces into the bowl and turn a few times until all the chicken is covered with marinade. Add the chicken breasts to a hot frying pan on medium/high heat and sizzle the chicken for 4 minutes on each side until you get the chicken looking like it has been on a barbecue.

And because we used olive oil to make the marinade, there is no need to add any oil when frying the chicken, although you may need to add a dash or two if you’re using high heat to prevent the marinade from burning.

When you have completely finished sizzling the chicken, the chicken breasts should like the picture below which look like barbecued chicken. Remove the chicken and put aside to cool down while you make the salad dressing.

To finish off this chicken salad, lets make the salad dressing. You need a jar or a jug. Start by adding the Greek style yoghurt, mustard, Worcester sauce, lemon juice, olive oil, dried oregano, salt and pepper and mix well. This is a tangy salad dressing that adds an amazing taste to your chicken salad.

Using a large salad bowl, add the iceberg lettuce, cucumber, spring onions, carrots, tomatoes and baby mozzarella balls and combine together. Slice the avocado into two halves, gently scoop out one half of the avocado using a large spoon, cut it into small slices and add on top of the combined salad ingredients.

Cut the boiled eggs into wedges and gently place on top of the salad, these have a habit of moving in different directions separately ????. Slice the chicken breasts into thick slices and place on top everything inside the salad bowl.

One last thing, drizzle the tangy salad dressing, add salt and pepper to taste and enjoy your amazing Mediterranean style chicken salad.

Mediterranean Style Chicken Salad
Print
clock clock iconcutlery cutlery iconflag flag iconfolder folder iconinstagram instagram iconpinterest pinterest iconfacebook facebook iconprint print iconsquares squares iconheart heart iconheart solid heart solid icon

Best Mediterranean Chicken Salad With Tasty Avocado


  • Author: Ihsan
  • Total Time: 30 mins
  • Yield: 4 1x

Description

You can have this Mediterranean Style Chicken Salad for lunch or dinner any day of the week, it is delicious, very filling and is ready within 30 minutes. This Chicken Salad will make a complete meal for 2 people and besides tasting yummy, it is pocket friendly too.


Ingredients

Scale

     For The Chicken Salad

  • 1 Large Chicken Breast
  • 2 Medium Tomatoes
  • 1 Mediterranean Cucumber
  • 1 Small Bunch Spring Onions
  • 1/2 A Small Iceberg Lettuce
  • 2 Small Carrots
  • 1/2 An Avocado
  • 2 Eggs
  • 8 Mini Mozzarella Balls

    For The Marinade

  • 1 tsp Nutmeg Powder
  • 2 tsp Salt
  • 1/2 tsp Black Pepper
  • 1 tsp Garlic Powder
  • 1 tsp Paprika
  • 1 tsp Coriander Powder
  • 1 tsp Ginger Powder
  • 1 tsp Dried Oregano
  • 1 tsp Dried Basil
  • Juice Of 1/2 A Lemon
  • 2 tbsp Olive Oil

    For The Dressing

  • 2 tbsp Greek Style Yoghurt
  • 1 tsp Mild Mustard
  • 1 tbsp Worcester Sauce
  • Juice Of 1/2 Lemon
  • 1 tbsp Olive Oil
  • 1 tbsp Honey
  • 1 tsp Dried Oregano
  • 1 tsp Salt
  • 1 tsp Pepper

Instructions

  1. Boil water in a pan enough to cover the 2 eggs. Add the 2 eggs, cover and simmer on low heat for 15 minutes. Remove the eggs and place in a pan with cold water to cool down.
  2. Make the marinade: Add into a small bowl; nutmeg powder, salt, black pepper, garlic powder, paprika, coriander powder, ginger Powder, dried oregano, dried basil, lemon Juice and olive oil. Mix well until you get a smooth marinade. Slice the chicken breast into 2 halves. Cover the chicken with the marinade. Fry the chicken in a hot pan for 4 minutes on each side on medium/high heat. Remove the chicken and leave to cool down while making the salad.
  3. Make The Dressing: Add into a jar the yoghurt, mustard, Worcester sauce, Lemon juice, olive oil, honey, oregano, salt, and pepper. Mix well.
  4. Make The Salad: Chop the iceberg lettuce into bite size pieces,  slice the cucumber into medium thickness slices, cut the tomatoes into wedges, slice the carrots into thin slices, slice the spring onions into medium thickness slices, add all these ingredients into a large salad bowl, add baby mozzarella balls. Slice the avocado into 2 halves and scoop out one half gently with a large spoon. Slice the avocado half into bite size slices. Cut the boiled eggs into wedges and add to the salad.
  5. Slice the chicken into thick chunks and place on top of the salad. Drizzle the salad dressing on top. Add a sprinkle of salt and pepper to taste. Enjoy your yummy salad.

Notes

If you use high heat, you’ll need to add a dash or two of oil so that the marinade does not burn while sizzling the chicken, if the marinade burns, you can scrape it off with a spoon or small knife and your chicken will still taste amazing.


  • Prep Time: 15 mins
  • Cook Time: 15 mins
  • Category: Salad
  • Method: Stove Top
  • Cuisine: Mediterranean

Nutrition

  • Serving Size:
  • Calories: 540
  • Sugar: 12.6 g
  • Sodium: 3629.6 mg
  • Fat: 14.9 g
  • Carbohydrates: 26.2 g
  • Protein: 79.2 g
  • Cholesterol: 128.8 mg

Keywords: Mediterranean, Chicken Salad, Avocado Salad, Delicious

Cauliflower And Potato Soup

Best Creamy Cauliflower And Potato Soup

Best Creamy Cauliflower And Potato Soup Read More »

Vegetarian, Favourite, soup

If you like a mealy soup, you’d absolutely love this creamy cauliflower and potato soup. This is an old favourite of mine which is the first thing that comes to mind whenever I think of making soup, well because I love it. It is very easy to make and pocket friendly too.

Cauliflower and Potato Soup

This cauliflower and potato soup will take about thirty minutes to make but you can improve on this cooking time if you’re in a hurry. You can save some time by blitzing the ingredients after 10 minutes of cooking and using medium/high heat instead of medium.

Watch How To Make The Cauliflower And Potato Soup

I prefer to cook this for thirty minutes on medium heat to let it simmer rather than using higher heat, this will keep the vegetables at their best.

To make this yummy cauliflower and potato soup, start by adding one tablespoon of olive oil to a hot pan on medium heat and sizzle the diced onions for a couple of minutes until they become translucent. Add the finely chopped garlic and root ginger and stir for half a minute to a minute but ensure they do not start to brown because they will have a bitter taste.

By this time your kitchen will start to smell amazing from the wonderful aroma of the onions, garlic and root ginger being mixed and fried together.

Add the potato cubes and cauliflower florets and stir for half a minute until they are all covered with the olive oil and juices of the onions, garlic and root ginger.

Add the vegetable broth (you can also use chicken broth if you’re not vegetarian which adds more flavour), salt and pepper and bring to the boil.

Cover and simmer on medium heat for twenty minutes. Blitz the vegetables with a hand blender for a few minutes until you get a smooth puree.

Add the lemon juice, cream and cheddar cheese and stir for a couple of minutes until the cheese is completely melted and the soup has a slightly thicker texture.

Dish out the cauliflower and potato soup into a bowl of delicious and yummy treat, decorate it with fresh parsley and cheddar cheese and serve it with toasted bread.

I have tried many different types of bread and croutons and although I like many types of bread, I eventually settled on sliced toasted French stick to be the best type of bread to accompany my soups, because beside the great taste, they don’t break and fall into the soup when you try to dip them in.

Of course everyone has their preferred taste, but if you’d like you can give French stick toast a go to see if it is perfect for you too.

Once you have tasted this cauliflower and potato soup, you will find your true “Soup Love” and I believe you will make this many times and tweak it to suit your own taste and preference.

The amazing thing about this cauliflower and potato soup is, it is healthy, totally vegetarian and besides being a complete meal, it’s pocket friendly too. I hope you enjoy making it.

I love making soups because they are easy to make, healthy and pocket friendly, but you can also get as creative as you like trying different herbs and spices and adding cheese and mixing vegetables, well you get the point, the sky is the limit when it comes to creativity and there is no right or wrong, if you love what you’ve created you make it again and again and if you don’t, there is always next time to find your true “Soup Love”. ????

Of course you can always stick to making the classic soups to be on the safe side but if you don’t try, you will never find out what you’ve been missing!

Print
clock clock iconcutlery cutlery iconflag flag iconfolder folder iconinstagram instagram iconpinterest pinterest iconfacebook facebook iconprint print iconsquares squares iconheart heart iconheart solid heart solid icon
Cauliflower And Potato Soup

Best Creamy Cauliflower And Potato Soup


  • Author: Ihsan
  • Total Time: 30 mins
  • Yield: 4 1x

Description

If you like a mealy soup, you’d absolutely love this creamy cauliflower and potato soup. This is an old favourite of mine which is the first thing that comes to mind whenever I think of making soup, well because I love it. It is very easy to make and pocket friendly too.


Ingredients

Scale
  • 1 Large Cauliflower
  • 2 Large Potatoes
  • 1 Medium Onion
  • 1/2 A Lemon
  • 200ml Cream
  • 150g Cheddar Cheese
  • 2 Garlic Cloves
  • 1 tbsp Root Ginger
  • 1 Cup Vegetable Broth
  • 1 tbsp Olive Oil
  • Salt & Pepper To taste

Instructions

  1. Chop the cauliflower into florets and the potatoes into small cubes. Dice the onion to medium pieces, chop the garlic and root ginger into fine pieces.
  2. Add 1 tbsp olive oil in a hot pan, add the diced onions and turn for a minute or 2 until they become translucent. Add the chopped garlic, root ginger and stir for 30 seconds or before becoming brown. Add the potatoes and cauliflower and stir for 30 seconds.
  3. Add a cup of vegetable broth, salt, pepper and bring to the boil. Cover and simmer on medium heat for 20 minutes
  4. Blitz using a hand blender until you get a smooth puree. Add the juice of half a lemon, cream and cheddar cheese.  Stir until the cheese is melted and serve with toasted bread.

Notes

This recipe can serve 4 people as a starter or 2 people as a healthy meal with toasted bread.

I have found the French Stick sliced toasted bread to be the best with soups, because the toasted bread will be crunchy on the outside and soft in the middle which makes it stay in one piece when you dip it into the soup. You may have a different favourite, but either way, give it a try.

  • Prep Time: 10 mins
  • Cook Time: 20 mins
  • Category: Soup
  • Method: Stove Top
  • Cuisine: Mediterranean

Nutrition

  • Serving Size:
  • Calories: 472
  • Sugar: 9.5 g
  • Sodium: 1073.6 mg
  • Fat: 26 g
  • Carbohydrates: 47.5 g
  • Protein: 17 g
  • Cholesterol: 65.8 mg

Keywords: Creamy, Cauliflower, Potato, Soup, Vegetarian

Mediterranean Chicken Kebab

Best Juicy Mediterranean Chicken Kebab

Best Juicy Mediterranean Chicken Kebab Read More »

Lunch, Dinner, Favourite

Lets make this crispy on the outside and juicy in the middle Mediterranean chicken kebab. It’s easy peasy with some lemon squeezy!!!

This is one meal choice that you can have any day of the week and at any time you like for lunch or dinner. It is light, easy to make and very tasty.

The secret to keeping the chicken breast I used for this Mediterranean Chicken Kebab juicy in the middle is to trap the moisture from the marinade inside the chicken whilst cooking it.

I prefer chicken breast which is not as good as the chicken legs and thighs when it comes to handling heat when it’s being baked or grilled, it usually gets dry, but if you prefer you can use the dark chicken meat to make this Mediterranean Chicken Kebab, it’s your personal preference.

And because the chicken breast gets dry when being grilled, instead of grilling it, I pan fry it in a very hot pan for thirty seconds on each side just to make it crispy, then cover it with more marinade, foil paper and bake it in the oven.

The result is crispy on the outside and juicy in the middle Mediterranean Chicken Kebab. Of course we’re all different and you can tailor-make this to suit your preferred taste, making it more juicy or crispier on the outside.

Watch how to make the Mediterranean Chicken Kebab

For this recipe, I used chicken, red, yellow and green bell peppers, red onions and cherry tomatoes, but you can use any vegetables you like including mushrooms, courgettes, aubergines or anything else you’d like to try.

For the marinade, I used Greek style yoghurt, paprika, garlic powder, cinnamon, coriander, cumin, turmeric, olive oil, salt and pepper.

Mix it all very well until all the spices are combined with the yoghurt and olive oil and the marinade becomes like a smooth paste.

After the chicken is mixed with the marinade, cover with cling film and refrigerate for one to two hours. You can also, keep it in the fridge over night to let the marinade do it’s magic the day before you make the kebabs.

After removing the marinated chicken from the fridge, I add the juice of half a lemon and a tablespoon of sweet paprika on top and mix it well to add a tangy taste and some colour to the marinade.

If you use bamboo skewers, you can soak them in water for 20 minutes so they don’t become dry or burn. Even though I am not grilling the kebabs, it’s always a good practice to keep the skewers wet before cooking the kebabs.

At the same time, you can preheat the oven to 200 degrees Celsius which is just under 400 degrees Fahrenheit, and use the time to cut the bell peppers, and onions into bite size chunks.

You can place the peppers, onions and cherry tomatoes in any order you like before and after the chicken pieces to have a variety of colours and combinations that will make them look different and more appetising.

Once you skewer all the chicken and vegetables, heat up a frying pan on medium/high heat and sizzle the chicken kebabs for 30 seconds on each side or until they become crispy.

Then place a sheet of waxed paper on your oven tray, place the kebabs on the sheet and brush them with more marinade. Cover with foil paper and place in the oven for 15 minutes for very juicy kebabs or add a few more minutes ( 2 – 3 ) to have them less juicy.

Once the kebabs are completely cooked, you can remove them from the oven and serve with pitta bread or tortillas and salad or anything else you prefer like rice, mash potatoes or chips. Give this Mediterranean Chicken Kebab a try and I’m sure you will love it.

Print
clock clock iconcutlery cutlery iconflag flag iconfolder folder iconinstagram instagram iconpinterest pinterest iconfacebook facebook iconprint print iconsquares squares iconheart heart iconheart solid heart solid icon
Mediterranean Chicken Kebab

Juicy Mediterranean Chicken Kebab


  • Author: Ihsan
  • Total Time: 1 hr, 40 mins
  • Yield: 4 1x

Description

Lets make this crispy on the outside and juicy in the middle Mediterranean style chicken kebab. It’s easy peasy with some lemon squeezy!!!

This is one meal choice that you can have any day of the week and at any time you like for lunch or dinner. It is light easy to make and very tasty.


Ingredients

Scale
  • 2 Large Chicken Breasts (500g)
  • 200g Greek Style Yoghurt
  • 1 Bell Pepper or 1 third Of Each Of 3 Different Colour Peppers
  • 1 Medium Onion
  • 8 Cherry Tomatoes
  • 2 tsp Paprika
  • 2 tsp Garlic Powder
  • 1/2 tsp Cinnamon
  • 1 tsp Cumin
  • 2 tsp Coriander
  • 1 tsp Turmeric
  • 2 tsp Salt
  • 1 tsp Pepper
  • 1 tbsp Sweet Paprika
  • 1/2 A Lemon
  • 3 tbsp Olive Oil

Instructions

  1. Start by cutting the chicken breast into chunky pieces larger than you’d expect them to be as they will shrink a little during the cooking.
  2. Make the marinade starting with the youghurt and add all the spices, leaving the juice of half a lemon and 1 tbsp of sweet paprika which you can add after the marinade has been refrigerated. Mix well, cover with cling film and refrigerate for 1 – 2 hours or over night if you prepare it a day earlier. Soak the bamboo skewers in water for 20 minutes.
  3. Heat up the oven to 200 degrees C ( approximately 400 F). Take out the marinated chicken out of the fridge. Add 1 tbsp of sweet paprika and the juice of half a lemon, mix well. Cut the Peppers and onion to bite size pieces. Skewer the marinated chicken, peppers, onions and cherry tomatoes.
  4. Heat up a frying pan to medium/high and sizzle the kebabs 30 seconds on each side. Place a waxed sheet onto an oven tray. Place the kebabs on the waxed paper and brush with the marinade. Cover with foil paper and bake for 15 minutes ( an extra 2 – 3 minutes for less juicy kebabs).
  5. Remove the kebabs from the oven and serve with salad and pitta bread.
  • Prep Time: 1 hr, 10 mins
  • Cook Time: 30 mins
  • Category: Dinner
  • Method: Stove Top & Oven
  • Cuisine: Mediterranean

Nutrition

  • Serving Size:
  • Calories: 343
  • Sugar: 13.7 g
  • Sodium: 1240.5 mg
  • Fat: 16.6 g
  • Carbohydrates: 24.6 g
  • Protein: 27.9 g
  • Cholesterol: 68.6 mg

Keywords: Kebab, Chicken, Mediterranean, Juicy, Crispy

Delicious Avocado Toast

Easy Delicious Avocado Toast & Poached Egg

Easy Delicious Avocado Toast & Poached Egg Read More »

Vegetarian, Breakfast, Favourite

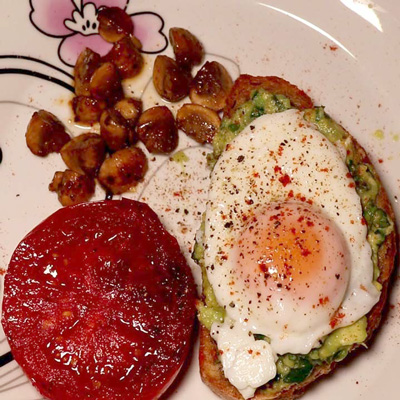
Hey breakfast lovers, having a delicious avocado toast with poached egg breakfast will help you get more out of your day.

Delicious Avocado Toast

Whether you’re going out to work, working from home or doing anything that requires you to stay focused and be productive, having a good breakfast will certainly help you achieve that.

This is one of my favourites which is a complete breakfast that is totally vegetarian and it will set you up for the day. It is full of goodness and very tasty. It also comes with the Avocado super fruit vitamins which has been proven to be extremely good for your health. You can also have it for lunch or dinner and it is ready in under 15 minutes, a completely filling avocado toast breakfast doesn’t get any better than that.

For the preparation of this tasty avocado toast, you need to cut your mushrooms into quarters, cut a medium size tomato into 2 haves and toast 2 slices of bread. Spread some room temperature butter onto the toast before spreading the creamy avocado on top of them.

For the avocado, you need to slice it into 2 halves, scoop out one half and use it for the mixture. Chop a handful of parsley into small pieces and add it to the avocado with the juice of half a lemon. Use a fork to gently mash up the avocado and blend it with the fresh parsley. Continue for a minute or two depending on how ripe your avocado until you get a creamy spread for your toasted bread.

Beside adding a tangy flavor, the lemon juice also helps prevent the avocado from browning.

Watch the video to learn how to easily slice an avocado. Every step is included to show you how to make this amazing breakfast easily.

Watch how to make the Delicious Avocado Toast

You can also check out the recipe card for the list of ingredients and print it to your computer or mobile phone for future use.


Avocado And Parsley In Lemon Juice

Mix fresh parsley with avocado and lemon juice to make a creamy, sumptuous spread and place it on top of toasted sourdough bread to get a Delicious Avocado Toast. Besides the heavenly taste, this is full of goodness and vitamins as well as having a mealy texture that satisfies your early morning hunger.

In the mean time, lightly pan fry a juicy tomato cut side down with some delicious mushrooms and gently poach two eggs in steamy water for about 4 to 6 minutes depending on how soft you like your egg to be.

Start by heating up your frying pan with olive oil and place the the tomato halves cut side down onto the hot olive oil. In another pan add enough water to cover the eggs and bring it to the boil. Once it starts to boil, turn the heat down to get the water to a simmer, add the eggs into the simmering hot water and after 1 minute cover the pan and turn the heat off.

Continue for 3 – 5 minutes to either have a runny egg or semi soft cooked yolk.

In the first frying pan add a small block of butter and toss the mushrooms in. Turn the heat down to medium and turn the mushrooms until they’re cooked on all sides. Add salt and pepper to taste.

This can be shared by 2 people with one poached egg on avocado covered toast, half a tomato and half of the mushrooms or if you’re having this for lunch or dinner, it can be for 1 person.

And when you’re all done cooking, the result will be an amazingly satisfying avocado toast breakfast that will set you off to a fantastic start of your day.

You have got to try this avocado toast at least once a week, the combination of these ingredients is YummyTastic!

Print
clock clock iconcutlery cutlery iconflag flag iconfolder folder iconinstagram instagram iconpinterest pinterest iconfacebook facebook iconprint print iconsquares squares iconheart heart iconheart solid heart solid icon
Delicious Avocado Toast

Delicious Avocado Toast & Poached Egg


  • Author: Ihsan
  • Total Time: 14 minutes
  • Yield: 2 1x

Description

Hey breakfast lovers, having a delicious avocado toast with poached egg breakfast will help you get more out of your day.

Whether you’re going out to work, working from home or doing anything that requires you to stay focused and be productive, having a good breakfast will certainly help you achieve that.

This is one of my favourites which is a complete breakfast that is totally vegetarian and it will set you up for the day. It is full of goodness and very tasty. It also comes with the Avocado super fruit vitamins which has been proven to be extremely good for your health.

You can also have it for lunch or dinner and it is ready in under 15 minutes, a completely filling breakfast doesn’t get any better than this.


Ingredients

Scale
  • 2 Slices Of Bread
  • 2 Eggs
  • 1 Medium Tomato
  • 68 Mushrooms
  • 1/2 An Avocado
  • 1/2 A Lemon
  • 1 tbsp Fresh Parsley
  • 1 tbsp Olive Oil
  • 1 tbsp distilled white vinegar
  • A Small Block Of Butter
  • Slat (Pepper & Sweet Paprika To Taste)

Instructions

  1. Preheat oven to 180 degrees C (approx 350 F). Slice the avocado into 2 halves and scoop out one half onto a bowl. Finely chop 1 table spoon of fresh parsley and add to the avocado. Add the juice of half a lemon and mash it all up gently with a fork until you get a creamy avocado spread. Add a little salt and pepper to taste.
  2. Butter the sliced bread and place in the oven for 6 – 8 minutes.
  3. Boil enough water in a pan to cover the eggs and turn the heat down to simmer. Heat up the olive oil on medium/high heat in a frying pan. Slice the tomato into 2 halves and place on the hot oil cut side down. Add sea salt and pepper.
  4. Add the distilled white vinegar into the hot water. Add the eggs into the simmering water for 1 minute, then cover and turn the heat off. Cook for 3 – 5 minutes depending on how soft you like your eggs.
  5. Turn the heat down to medium on the frying pan. Add a small block of butter. Cut the mushrooms into quarters and toss them into the melted butter. Turn the mushrooms until cooked on all sides. Remove the bread from the oven and butter. Add the avocado spread. Top with 1 egg on each slice, add half a tomato and half the mushrooms on each plate. Season with salt, pepper and sweet paprika to taste. Enjoy.

Notes

Besides adding a tangy flavour to the avocado spread, the lemon juice prevents the avocado from browning. So, you may like to use the juice of the other half of lemon to keep the second half of avocado from browning and refrigerate in a sealed container (it will stay fresh for 2 – 3 days).

The distilled white vinegar helps the eggs stay together while being poached.


  • Prep Time: 6 minutes
  • Cook Time: 8 minutes
  • Category: Breakfast
  • Cuisine: Mediterranean

Nutrition

  • Serving Size:
  • Calories: 423
  • Sugar: 8.1 g
  • Sodium: 231.8 mg
  • Fat: 28.3 g
  • Carbohydrates: 32.2 g
  • Protein: 17 g
  • Cholesterol: 201.3 mg

Keywords: Avocado Toast, Delicious Breakfast, Poached Eggs

Avocado , Tomato And Egg Salad

Easy Avocado, Tomato And Egg Salad

Easy Avocado, Tomato And Egg Salad Read More »

Vegetarian, Favourite, Recipe, Salad

Let’s make this tasty and delightfully filling avocado, tomato and egg salad which is completely vegetarian and really easy to make.

Whether you’re making a salad as a side dish with your food or want to make a salad as your main meal, this is one of the best salads you can make because it has all the ingredients that makes it a whole meal including the super fruit avocado which has been recommended by many experts for a healthy diet.

At the time of making this avocado, tomato and egg salad, I am staying on the Greek island of Crete and as you can see from the picture I have some Greek black olives complete with the pits which make the olives taste amazing.

For the preparation, most of the ingredients just require slicing into bite size pieces.

The only two ingredients that require removing the outer skin are the onion and avocado.

For the onion, just cut through both ends to remove the root part and the top part, cut into two halves and remove the two outer layers. Then slice the onion into thin slices.

For the avocado, you need to slice it into two haves, scoop out one half and slice it into small bite size chunks, or you can just use a spoon to scoop out little bits and toss them into the salad bowl, there’s no right or wrong here.

Watch the video to learn how to easily slice an avocado. Every step is included to show you how to make this amazing salad easily.

Watch how to make this Avocado, Tomato And Egg Salad

You can also check out the recipe card for the list of ingredients and print it to your computer or copy it to your mobile phone for future use.

I usually like to use red onions in most of my cooking, especially in salads because besides having a nice taste, they add colour to the dishes I make. However, with this salad, I decided to use a sweet white onion, and you may have noticed from the pictures, I started cutting the onion, then realised I hadn’t taken the pictures and as it was the last onion, I have a chopped onion in the picture. Still, it tasted really good. ????

And I also created a sweet and tangy dressing just for this salad, as I usually use a simple olive oil, balsamic vinegar and a sprinkle of dried oregano for my salad dressing, because it tastes great and takes 1 minute to make.

The dressing is based on Greek style yoghurt which makes the dressing just the correct density because I use Worcester sauce and lemon juice, both of which are very thin, so the yoghurt balances them, I also use honey which makes the dressing thickness just perfect for the salad.

So the dressings includes Greek style yoghurt, mild mustard, Worcester sauce, lemon juice, olive oil, honey, dried oregano, salt and pepper

Just before you add the dressing, you can remove the shells and slice two boiled eggs into wedges, add them on top of the salad, season with salt and pepper to taste and sprinkle some delicious tangy dressing on top.

Just a little tip here when adding the dressing, only use a little on the main bowl if you don’t intend to eat all the avocado, tomato and egg salad, otherwise you can dish out some of the salad into smaller bowls and then add the dressing. The reason for this, is your salad will start to lose quality if you refrigerate it while there’s dressing at the bottom of the bowl.

This avocado, tomato and egg salad makes enough for two people as a healthy salad meal or can be used as a side dish with your main meal.

And when you’re all done, the result will be an amazingly satisfying Mediterranean style salad that will satisfy your hunger as well as ensure you’re eating a delicious and tasty fruit and veg for a healthy diet.

You have got to try this at least once a week, the combination of these ingredients is yummytastic.

Print
clock clock iconcutlery cutlery iconflag flag iconfolder folder iconinstagram instagram iconpinterest pinterest iconfacebook facebook iconprint print iconsquares squares iconheart heart iconheart solid heart solid icon
Avocado , Tomato And Egg Salad

Easy Yummy Avocado, Tomato And Egg Salad


  • Author: Ihsan
  • Total Time: 20 mins
  • Yield: 2 1x
  • Diet: Vegetarian

Description

Let’s make this tasty and delightfully filling avocado, tomato and egg salad which is completely vegetarian and really easy to make.

Whether you’re making a salad as a side dish with your food or want to make a salad as your main meal, this is one of the best salads you can make because it has all the ingredients that makes it a whole meal including the super fruit avocado which has been recommended by many experts for a healthy diet.


Ingredients

Scale
  • 2 Eggs
  • 125g Baby Mozzarella Balls
  • 15 Cherry Tomatoes
  • 1/2 An Avocado
  • 1/2 An Iceberg Lettuce
  • 1/2 A Lemon
  • 1 Mediterranean Cucumber
  • 10 Black Olives
  • 1 Small Onion
  • 2 tbsp Greek Style Yoghurt
  • 1 tsp Mild Mustard
  • 1 tbsp Worcester Sauce
  • 1 tbsp Olive Oil
  • 1 tbsp Honey
  • 1 tsp Dried Oregano
  • 1 tsp Salt
  • 1 tsp Pepper

Instructions

  1. Boil 2 eggs for 15 minutes (bring water to boil, add eggs, cover and simmer on low heat).
  2. Start by chopping the lettuce into bite size and place into the salad bowl. Slice the cucumber and toss into the bowl. Remove the top and bottom ends and the 2 outer layers of the onion, slice thinly and add to the bowl. Slice as many as you like of the cherry tomatoes and add to the bowl. Toss in the baby mozzarella balls. Toss in the black olives. Slice the avocado into 2 halves and scoop out one half with a spoon, cut into bite size and add to the bowl.
  3. Now it’s time to make the dressing. Add 2 tbsp Greek style yoghurt into a jar. Add a tsp mild mustard. Add 1 tbsp Worcester sauce. Add the juice of half a lemon. Add 1 tbsp olive oil. Add 1 tbsp honey. Add 1 tsp dried oregano. Add 1 tsp salt & 1 tsp pepper. Mix it all well.
  4. Remove Egg shells and slice the eggs into wedges, add on top of the salad and drizzle with the remainder of the salad dressing. Season with salt and pepper. Enjoy.

Notes

You can use the juice from the second half of the lemon to preserve the second half of the avocado. Place it in a sealed container and refrigerate for 2-3 days.

  • Prep Time: 20 mins
  • Category: Salad
  • Cuisine: Middle Eastern

Nutrition

  • Serving Size:
  • Calories: 321
  • Sugar: 7.7 g
  • Sodium: 2008.9 mg
  • Fat: 16.2 g
  • Carbohydrates: 17.9 g
  • Protein: 28.8 g
  • Cholesterol: 154.9 mg

Keywords: Avocado, Tomato, Egg Salad

Shopping Cart
Scroll to Top

How Can I Help?

Please send your message to

support [at] IhsanMurad DOT com

I will reply as soon as possible, usually  within two business days Mon – Fri

Hello, I'mIhsan

Frequently Asked Questions

All items on this website are either digital downloads or available to access online. You will receive a link to the email address you provided during the checkout page.

The item is available for instant download or available for online access.

There will be nothing physical to ship via mail or post.

As described in the refund policy, we do not allow order cancellation. All digital sales are final.

Due to the nature of our digital downloads, when you make a purchase on our website, you will automatically receive an instant download link through which, you can download the item.

Therefor, a refund can not be offered, because you would have already received the item.

See our refund policy link below.

If you experience any issues with an item you purchased on our website, please contact our support and we will be very happy to resolve the issues you have.

Send an email describing the issue to

support [at] IhsanMurad DOT com

All our PDFs and digital downloads are copyright and password protected and can’t be edited.

Your purchase license entitles you to a personal rights use.

You may not edit, change, recreate, share, give away or resell any of our products, this will be violating copyright and intellectual property laws.

Your support and understanding is highly appreciated.

How To Download

Once your purchase is complete, an automated email will be sent to your registered email address with a link to download your file, (please pay attention to the path where you download your file).

If you face any issues with receiving the automated email, check your spam folder.

If you have any questions or need help, please send an email to

support [at] IhsanMurad DOT com and I’m here to help!

Ihsan

Shipping


All products including Printables and Online Courses are in digital format. This means, there will be no physical items shipped by mail or post. All items are available for instant download, courses videos are available for access online only.